Create Project wise profile URL on You Can Book Me Site
- Login to You Can Book Me site by using user credentials
- Create Project wise profile URL on the site
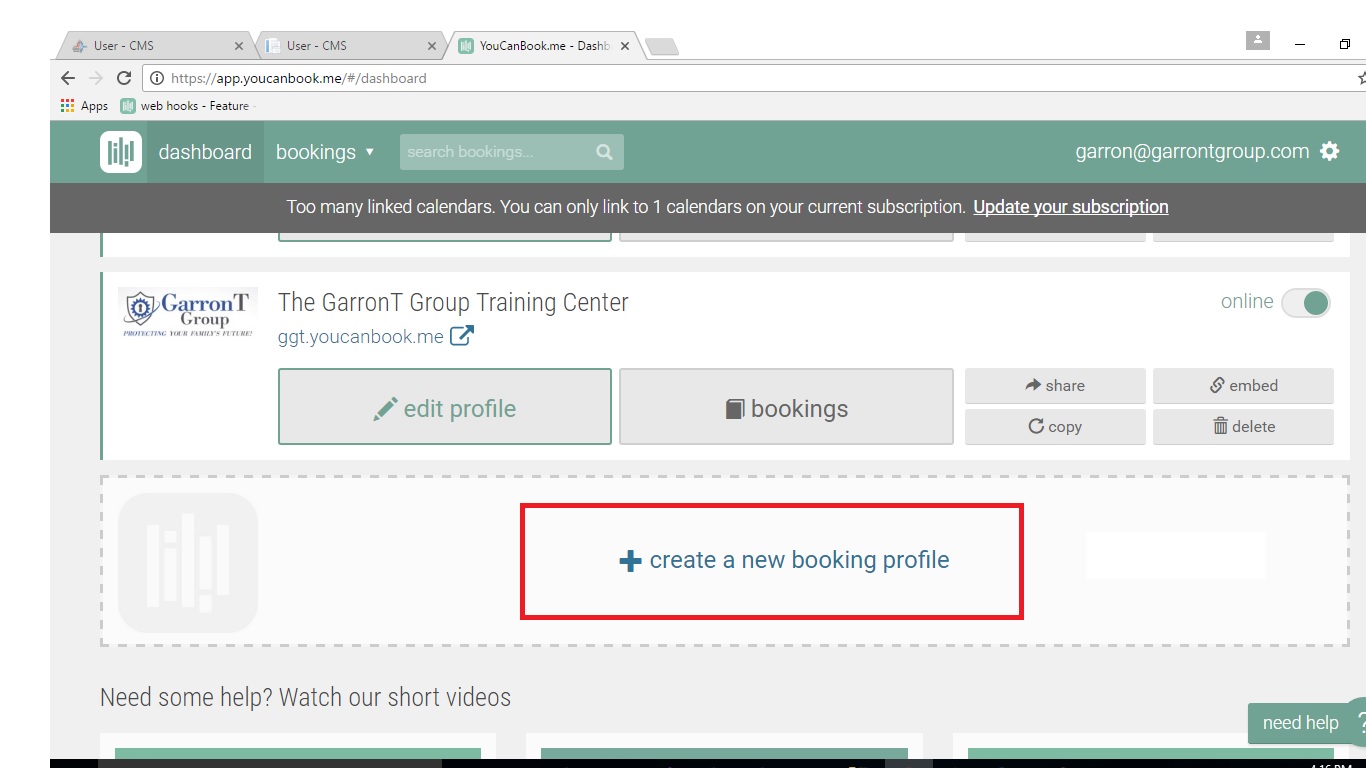
- There is option “Create new booking profile” (see the bottom) on the Dashboard.
- Click on “Create new booking profile”. New profile gets created. We have to manage newly created profile.
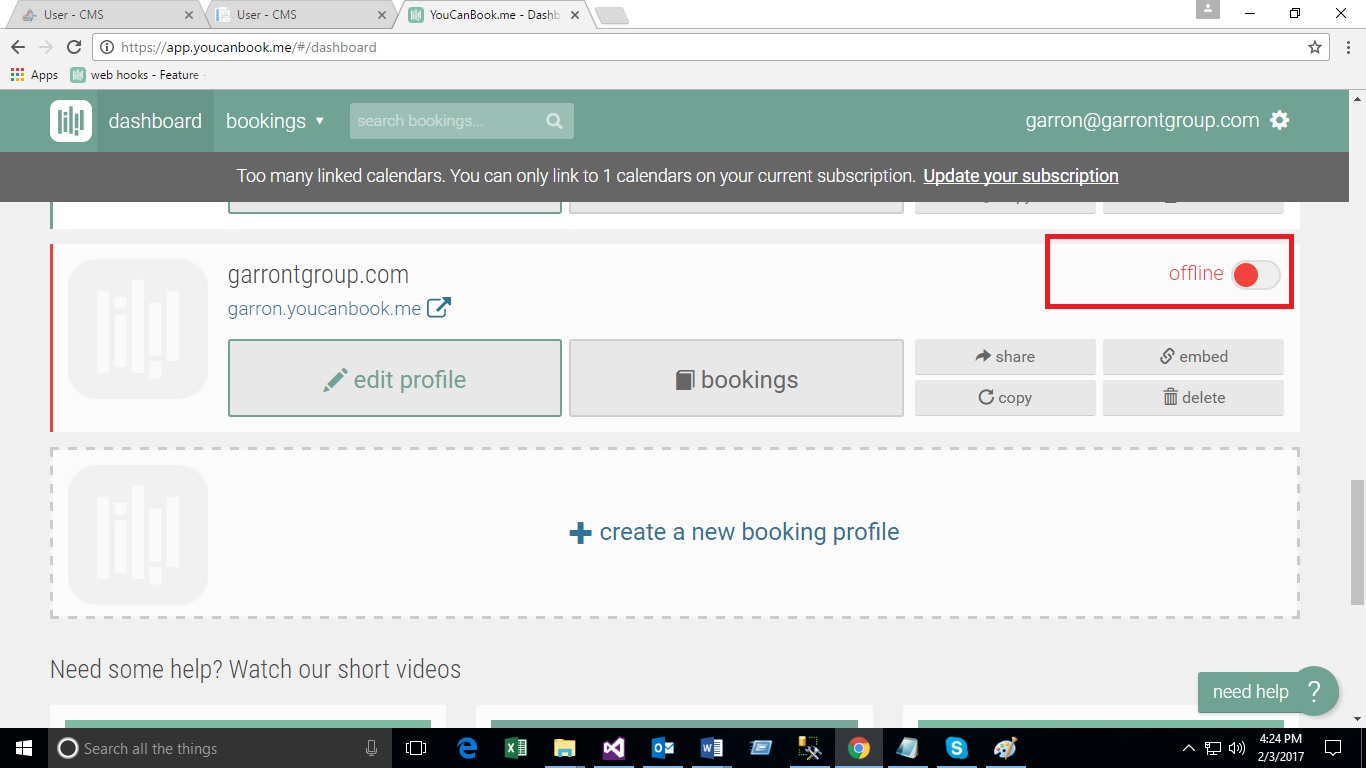
- Click on the “Offline” label to change it from red to green color “online” label on newly created profile. (see right hand side corner in window)
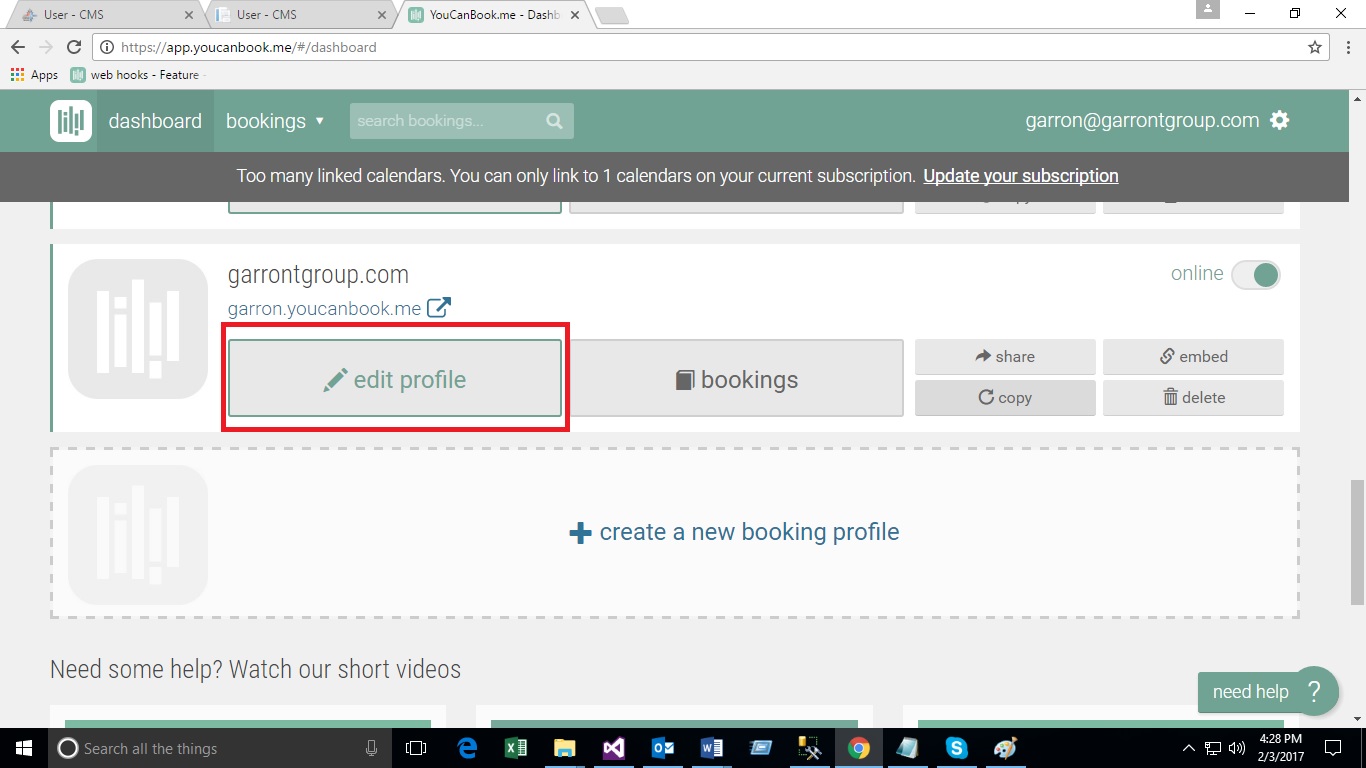
- To edit the newly created profile click on “edit profile” button located at left hand side see the below screen.
- After click on “edit profile” button we can see the following tabs for setting the Appointment Calendar:
- Basic tab
- Time tab
- Advanced tab
- Booking form tab
- Services
- Teams
- Afterwards
1. Basic tab
- This tab contains subtabs as follows:
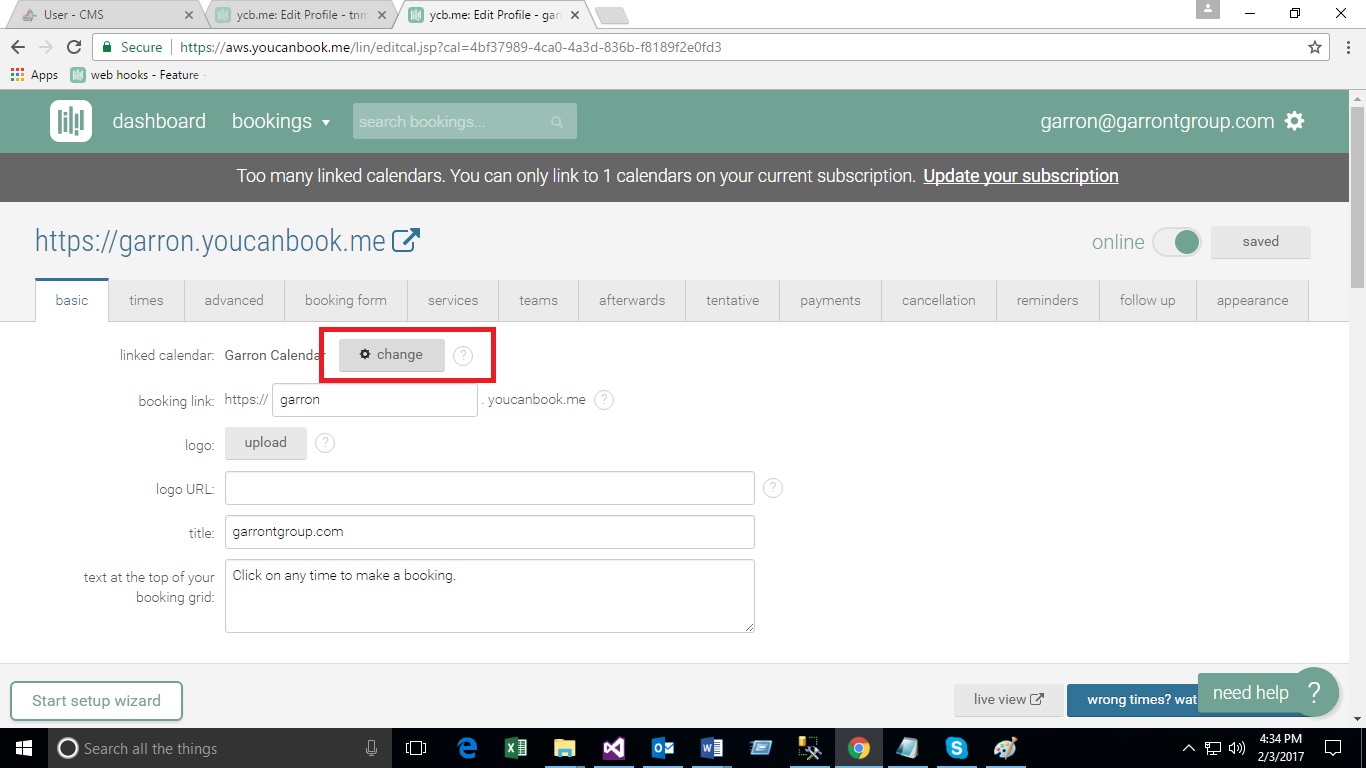
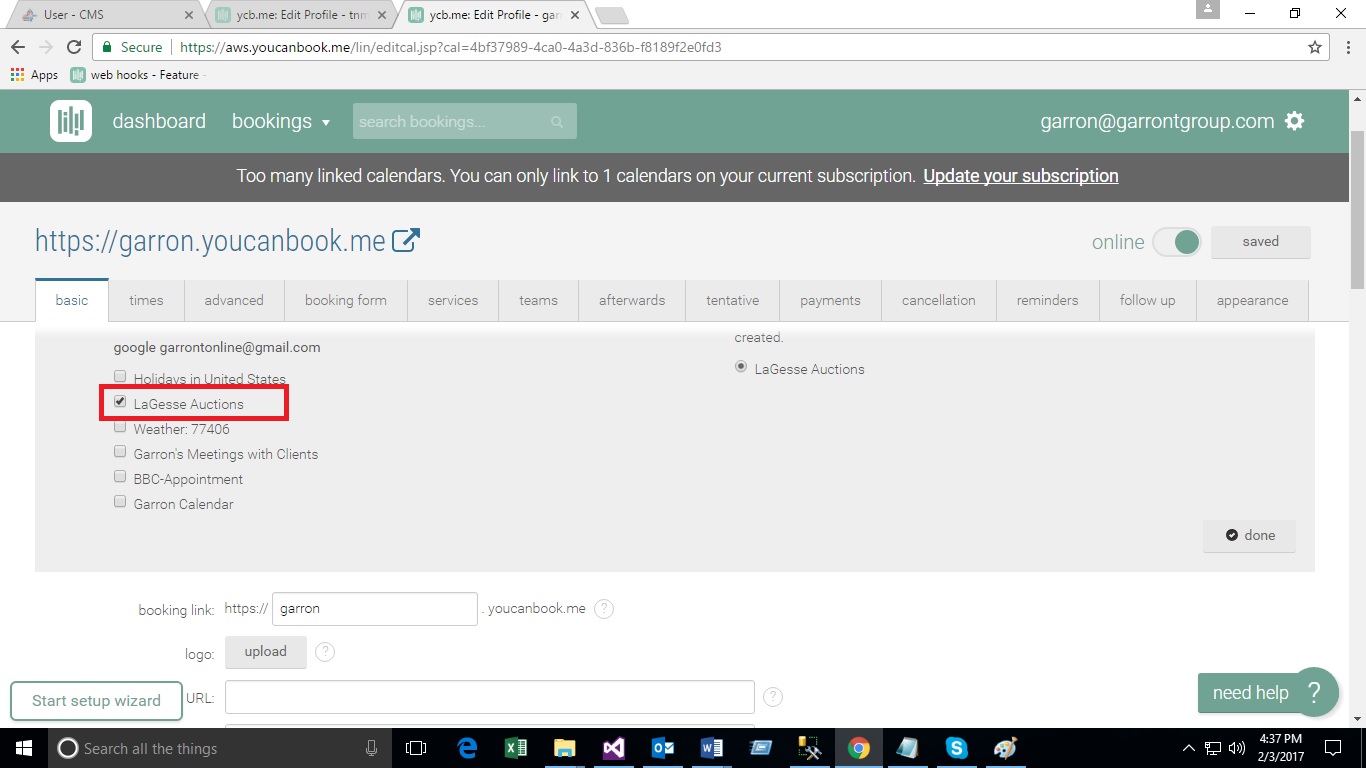
- Linked Calendar: (see the screen and follow the steps)
Follow steps:
- Click on ‘change’ button located in front of the label linked Calendar
- Select the check box “LaGesse Auctions” Calendar from the list of calendars
- Click on “done” button on top
- Click on “Save” button located at right hand corner.
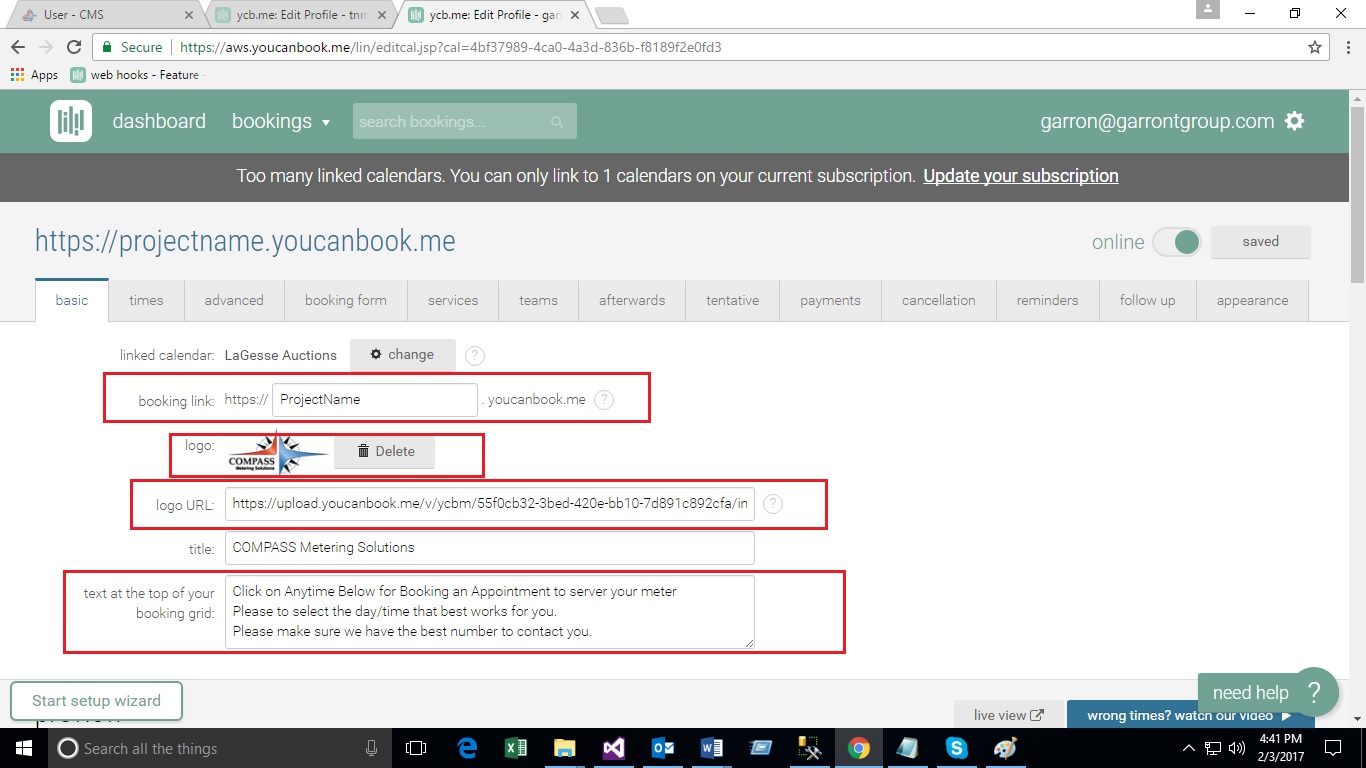
- Booking Link
- Give here booking link means our Project Booking Url
- Syntax : ProjectName+.youcanbook.me?
- Example : ProjectName.youcanbook.me?
- LIKE Examples: see the below links, Project name displayed in bold letters after that attach ‘. youcanbook.me?’
- Logo: Here we can upload our application logo
- Logo Url: Give logo url ( https://upload.youcanbook.me/v/ycbm/55f0cb32-3bed-420e-bb10-7d891c892cfa/images/csm_logo.png?type=mh250)
- Title: Title on the Calendar (Give this Title-Compass Metering Solution)
- Text at the top of your booking grid: to display the message on the calendar
- Enter the following message
- Click on Anytime Below for Booking an Appointment to server your meter
- Please to select the day/time that best works for you.
- Please make sure we have the best number to contact you.
- Click on “Save” button located at right hand corner.
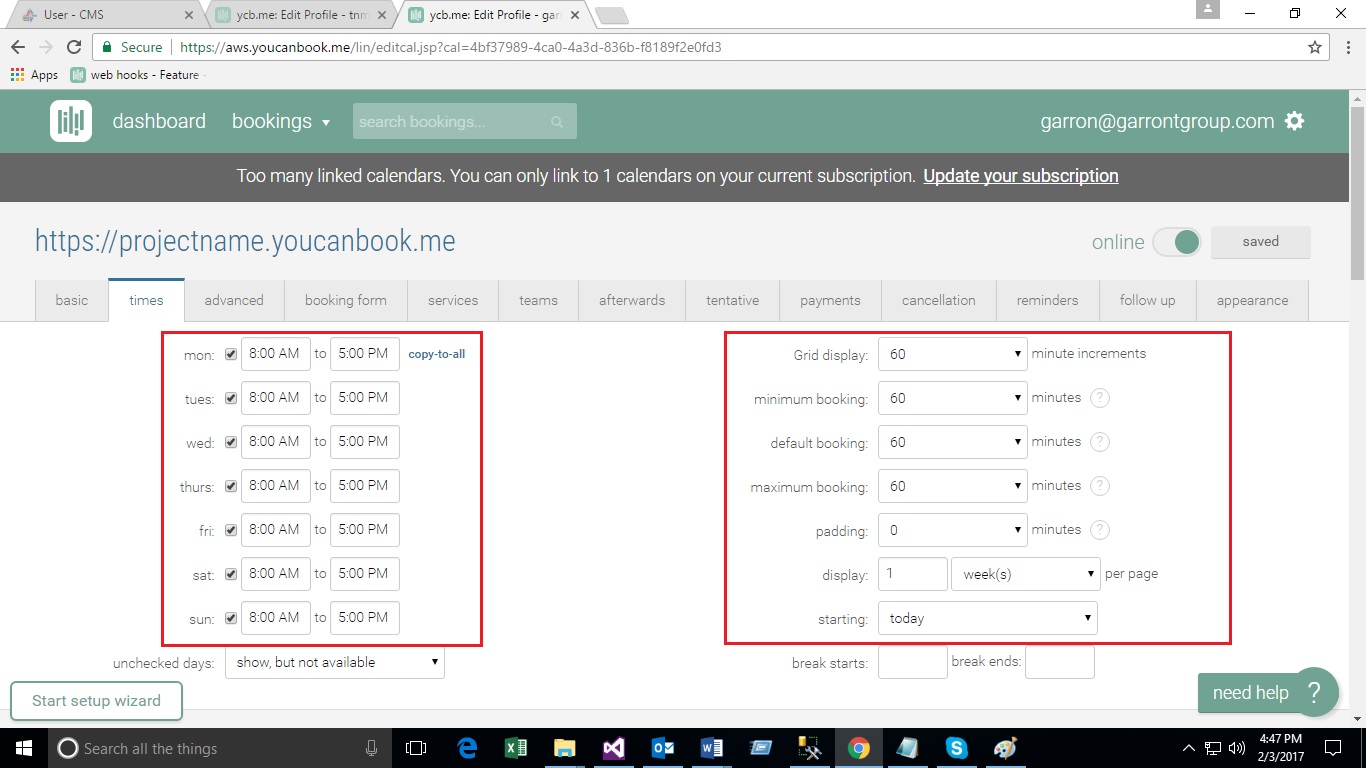
2. Time tab
- This tab used for time and duration between the appointment time slots.
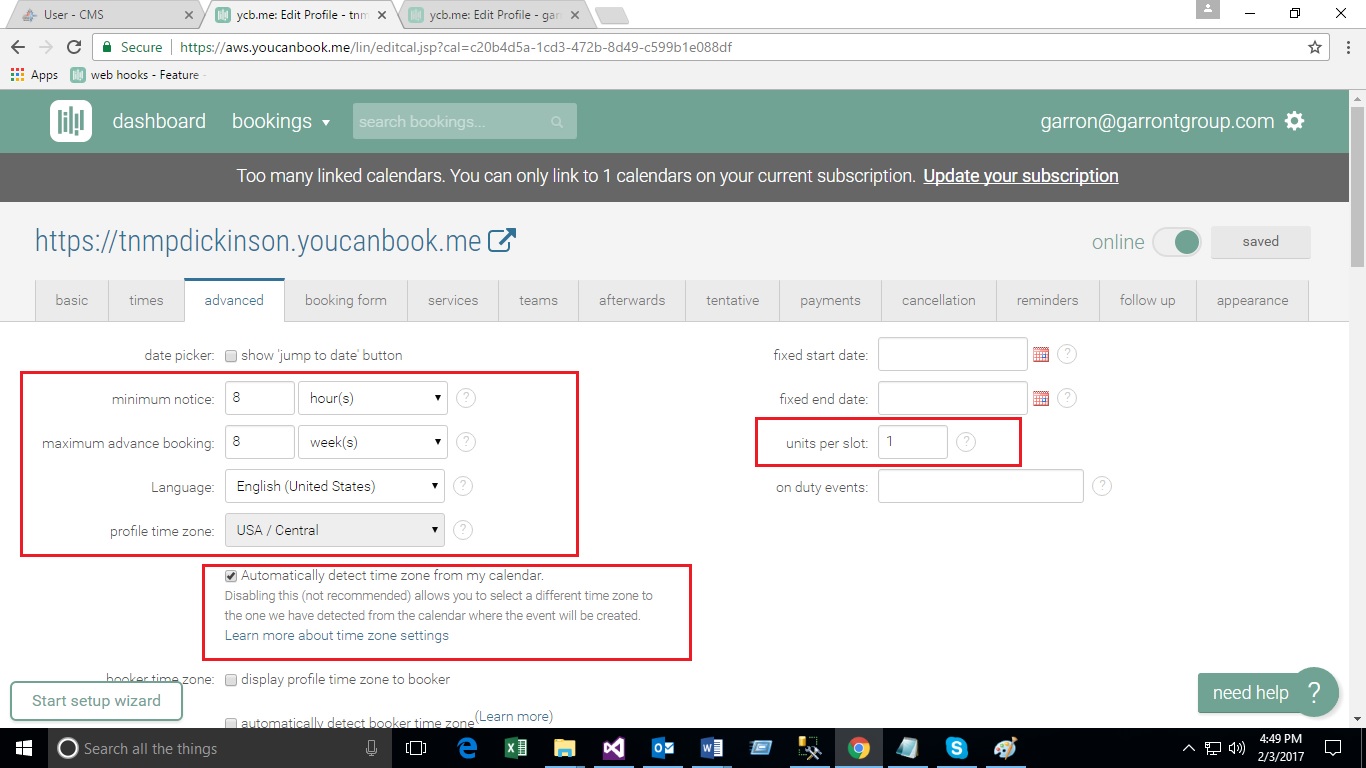
3. Advanced tab
- Used for advanced setting on the calendar (Please see the screen)
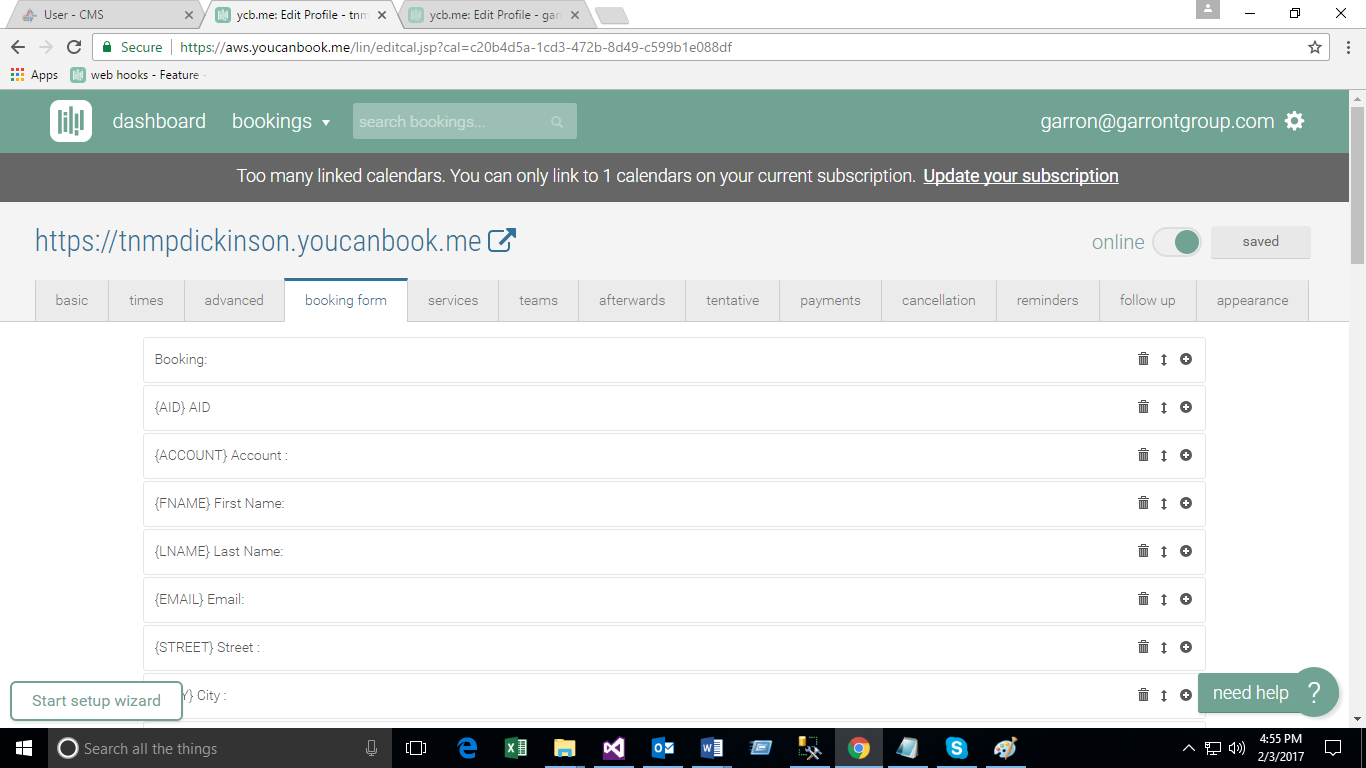
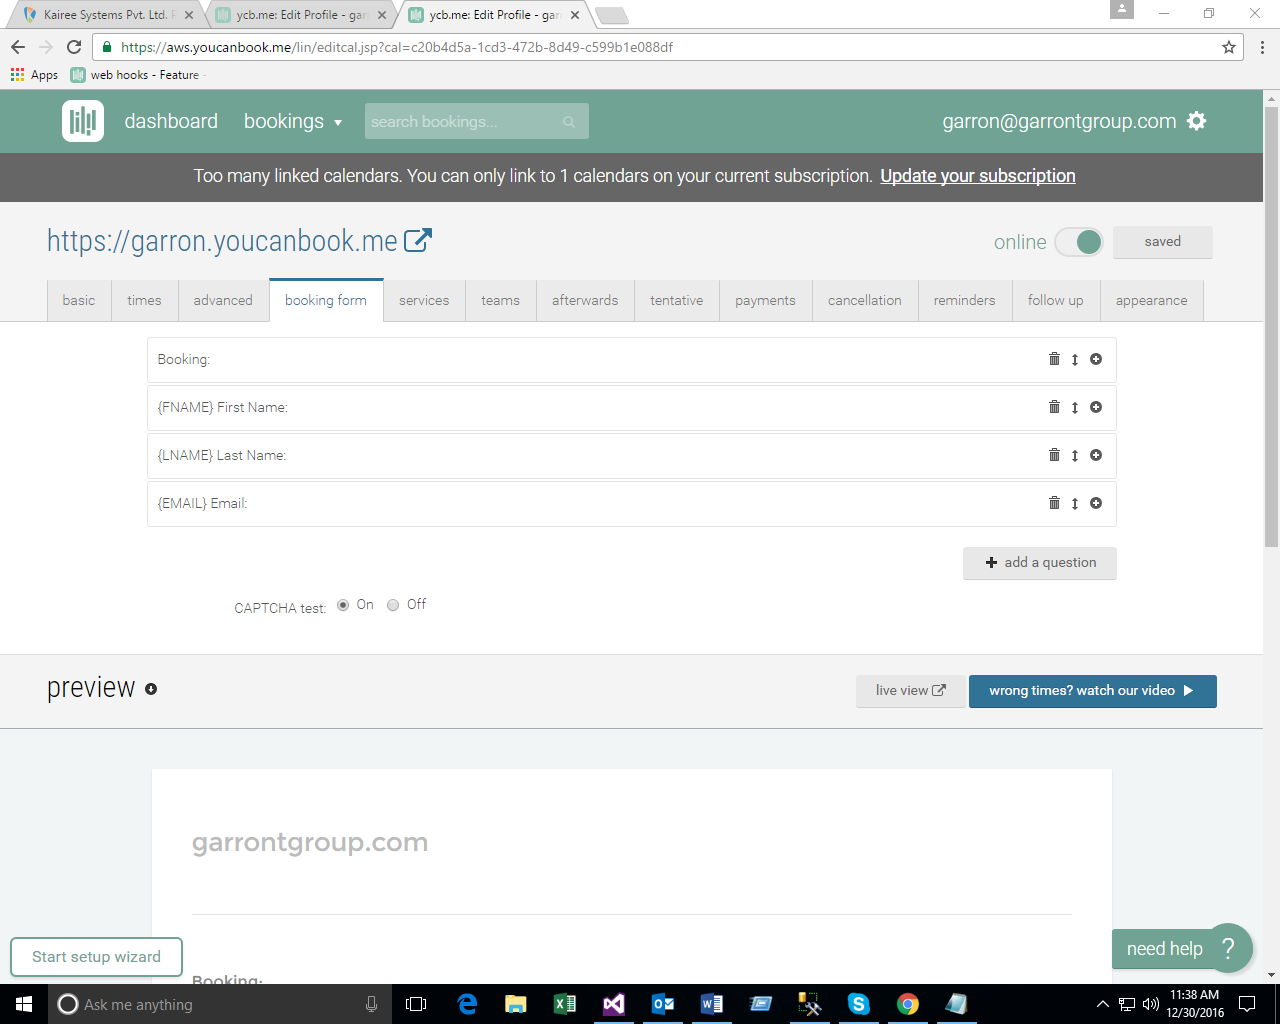
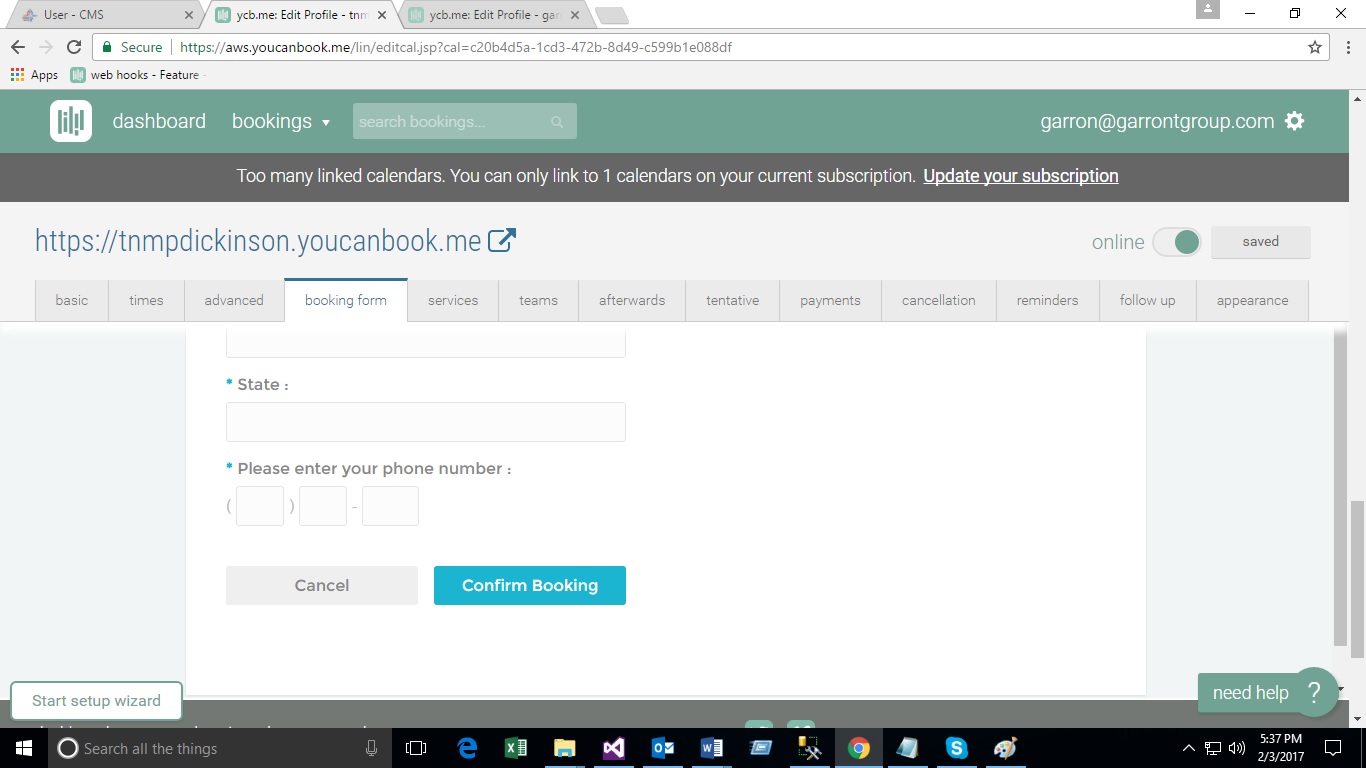
4. Booking form tab: (Below 2 screens)
- This is the booking form. We can make changes as per the requirement.
- Here we can add text boxes, Questions, Phone numbers according to country, for this there is a button “add a question” located at bottom.
- See the screen below(sample). See the following steps
See below details information about creation of booking form on YCB me site as follows:
- Create Booking Form on You Can Book Me site
Follow the steps:
- After login to You Can Book Me site click on the “edit profile” button on the particular project profile.
- Select “booking form” Tab and start to create Booking Form. See the screen
- You can create your booking form as per the requirement.
- Follow the process below
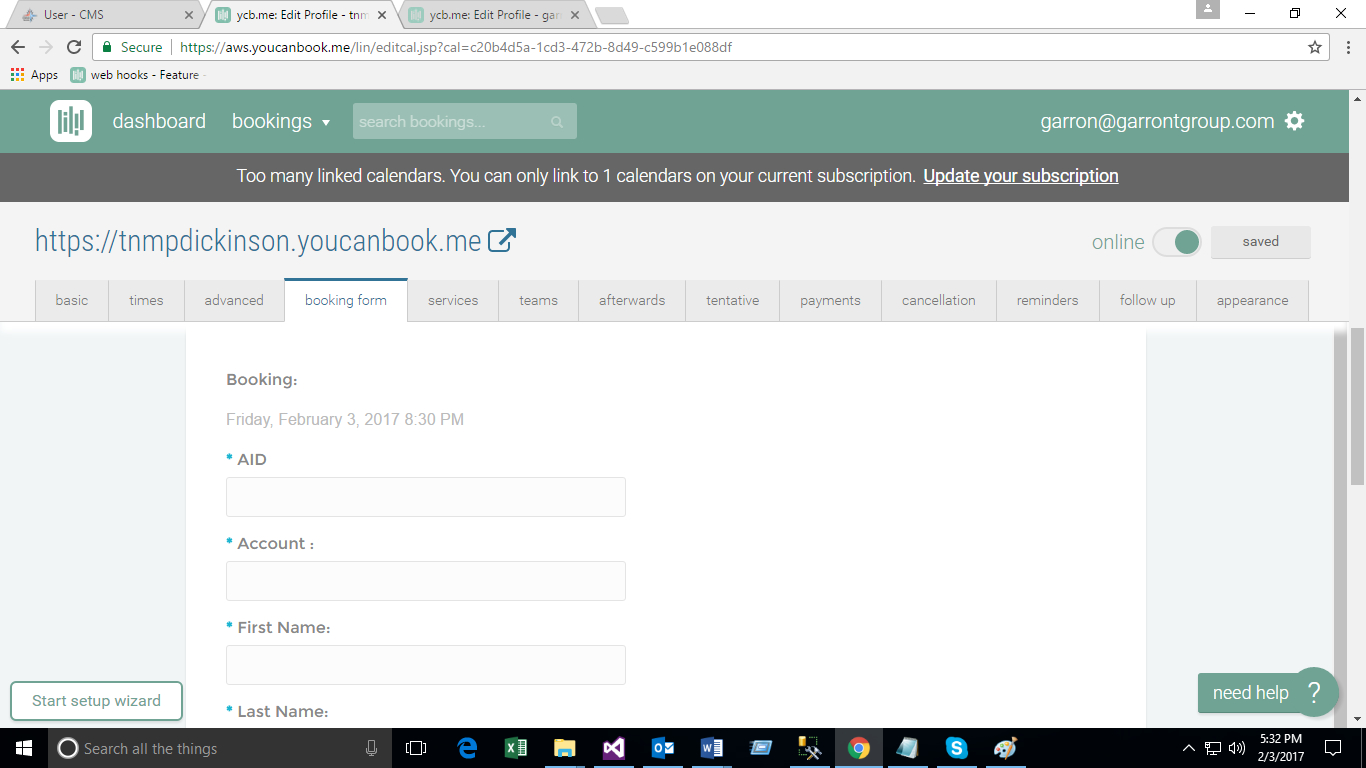
- Add text box: Booking
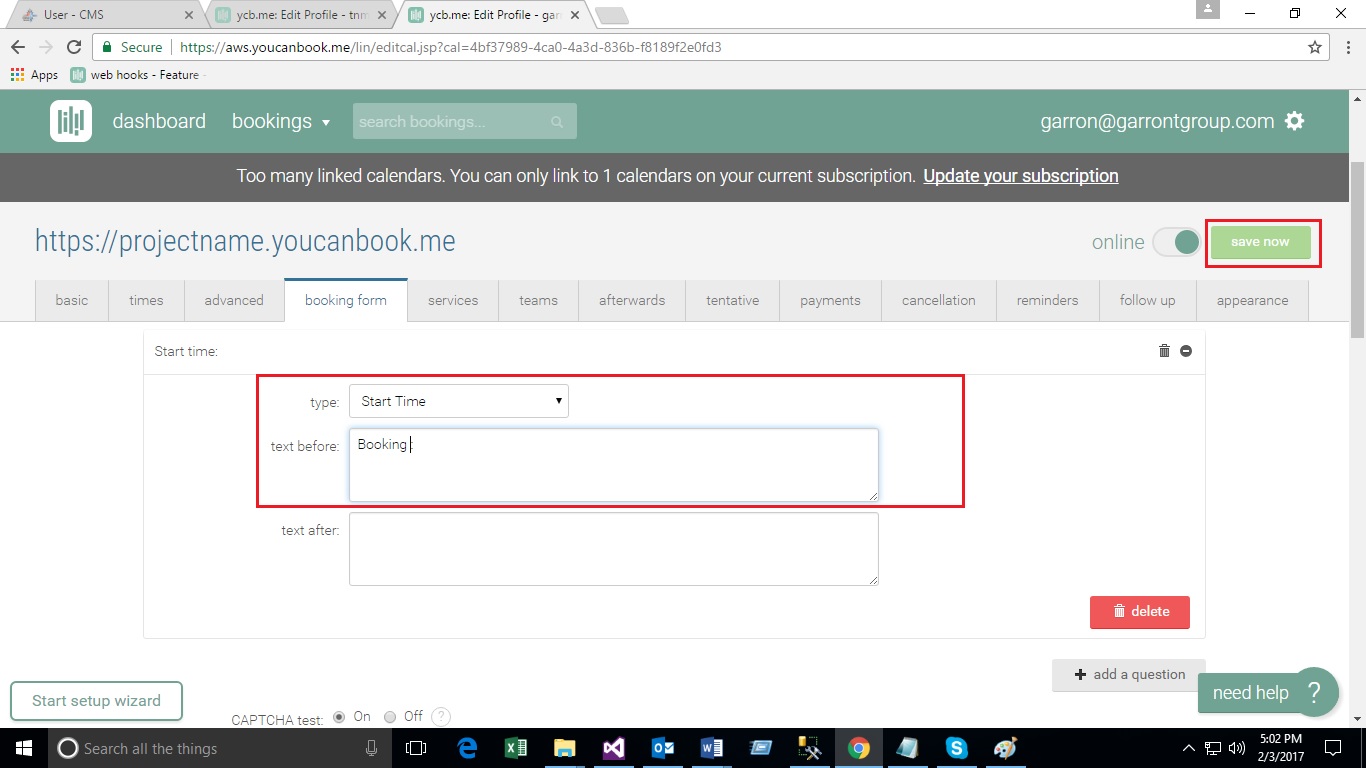
- Click on “add a question” button.
- Following screen displayed on the screen.

- Select “Start Time” from the type Drop Down List.
- Enter text “Booking :” in “text before” text box.
- Click on “Save” button.
- Click on “add a question” button. (See the screen)
- Select “simple one-line question” option from the type Drop Down List
- Enter the text “AID : “ in the text before text box.
- Check the check box “this is a required field”.
- Enter the value “AID” in the shorthand code text box.
- Click on “Save” button.
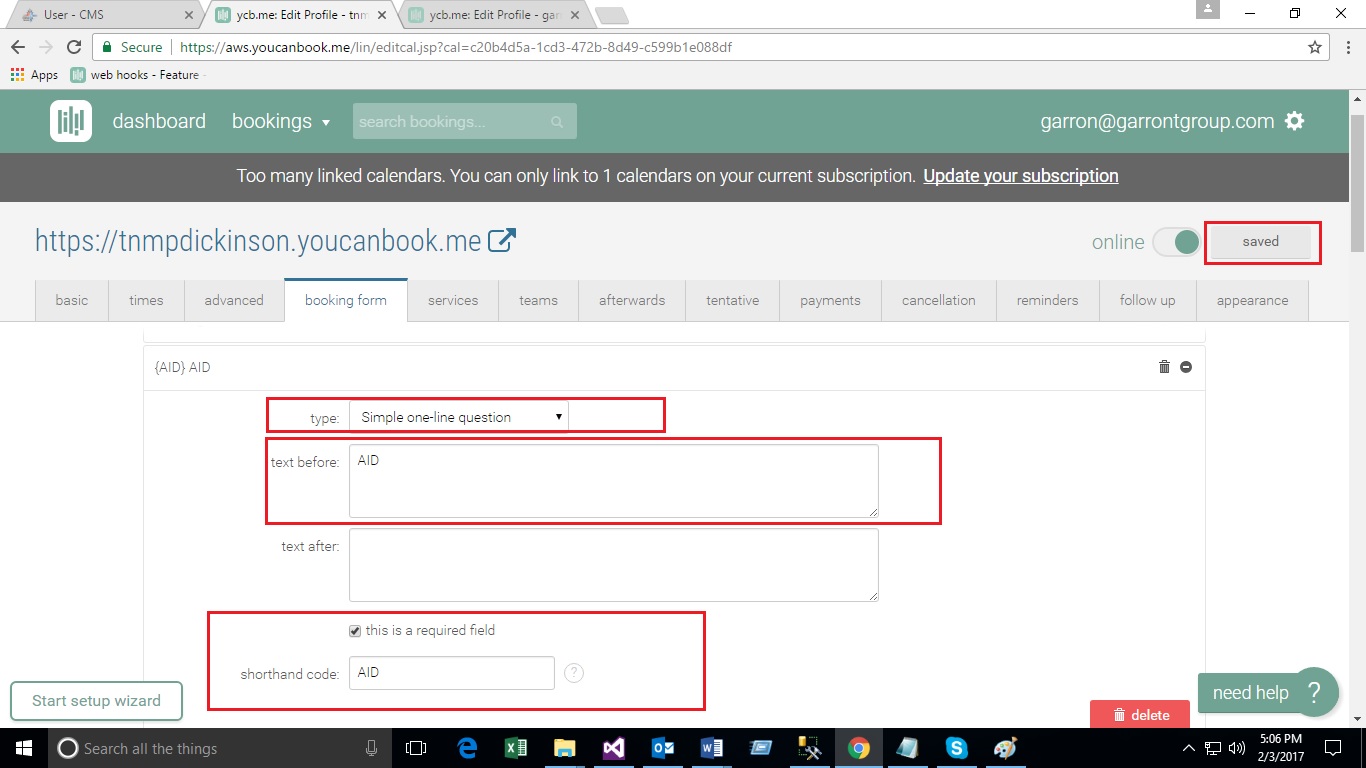
- Click on “add a question” button. (See the screen)
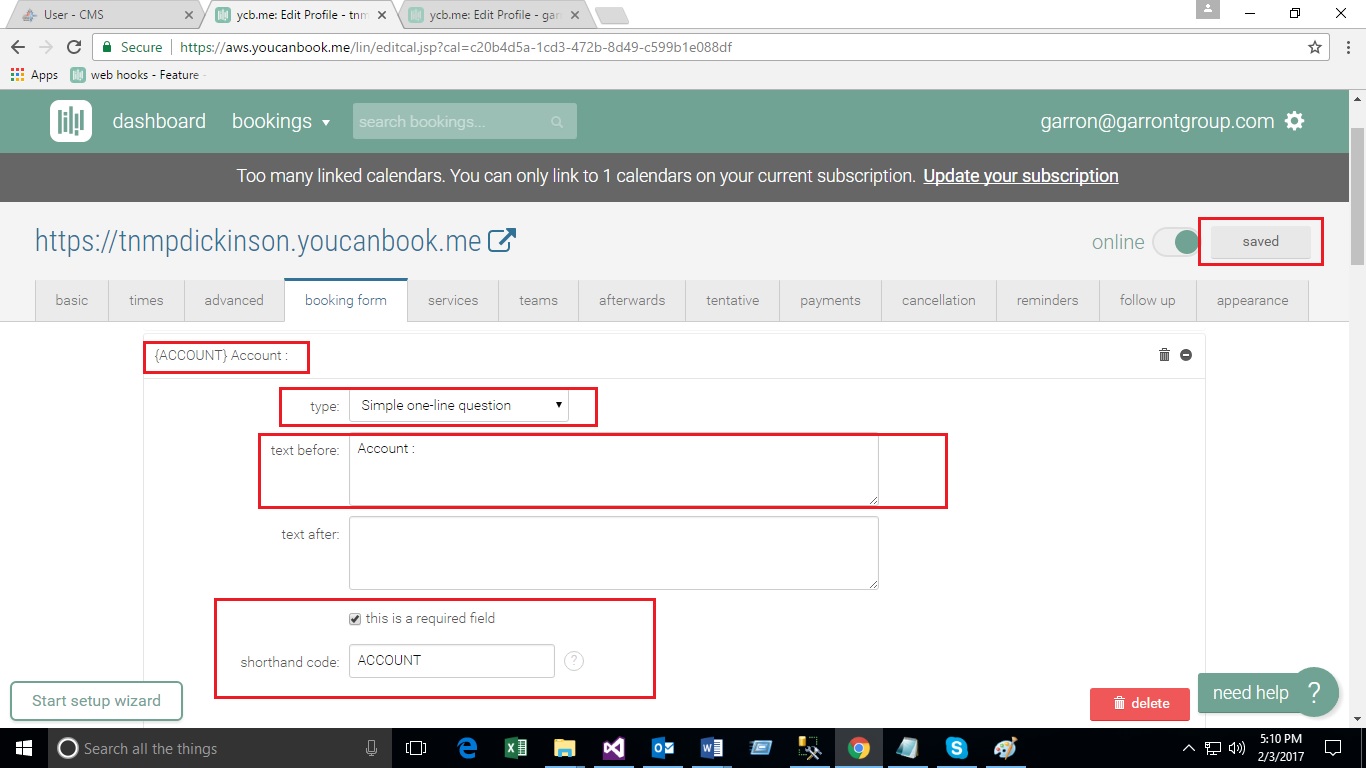
- Select “simple one-line question” option from the type Drop Down List
- Enter the text “ACCOUNT : “ in the text before text box.
- Check the check box “this is a required field”.
- Enter the value “ACCOUNT” in the shorthand code text box.
- Click on “Save” button.
- Add next text box: First Name
- Follow Steps:
- Again click on “add a question” button. (See the screen)
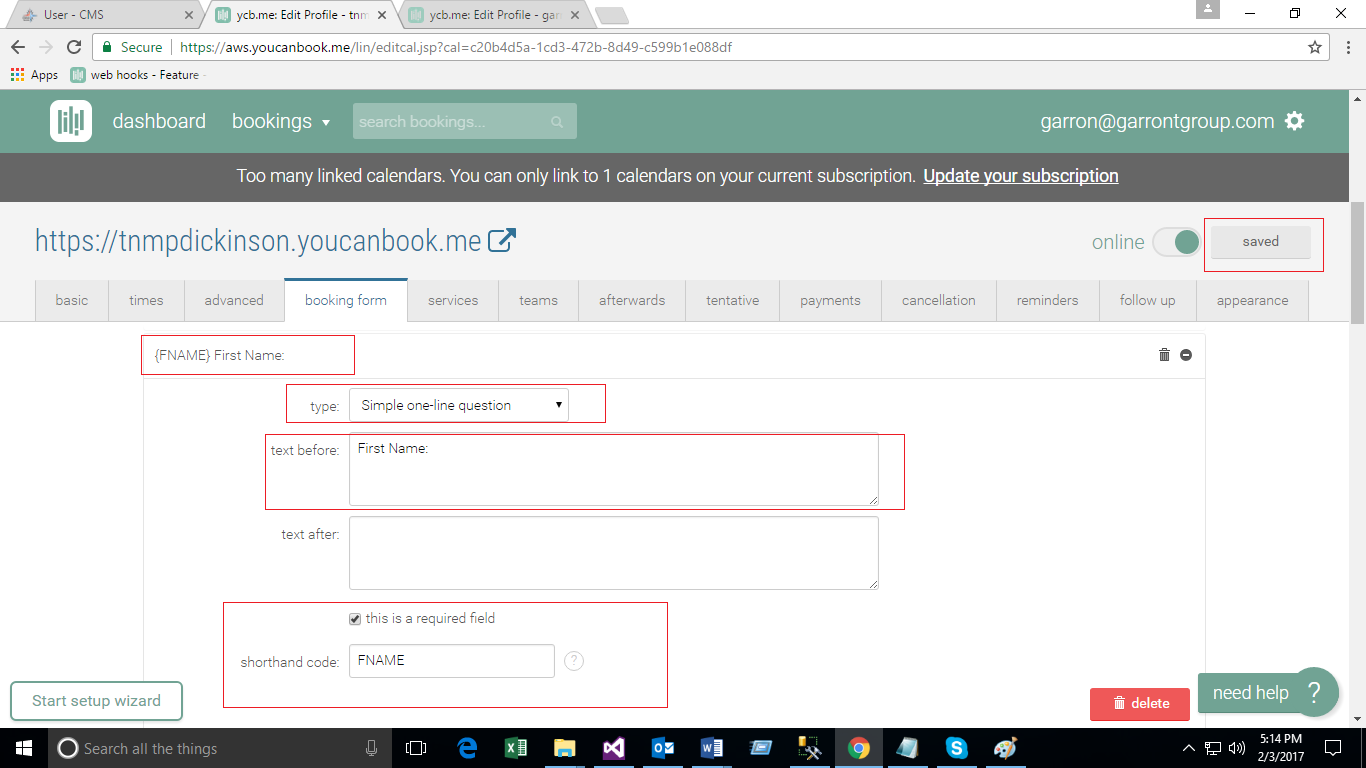
- Select “simple one-line question” option from the type Drop Down List
- Enter the text “First Name : “ in the text before text box.
- Check the check box “this is a required field”.
- Enter the value “FNAME” in the shorthand code text box.
- Click on “Save” button.
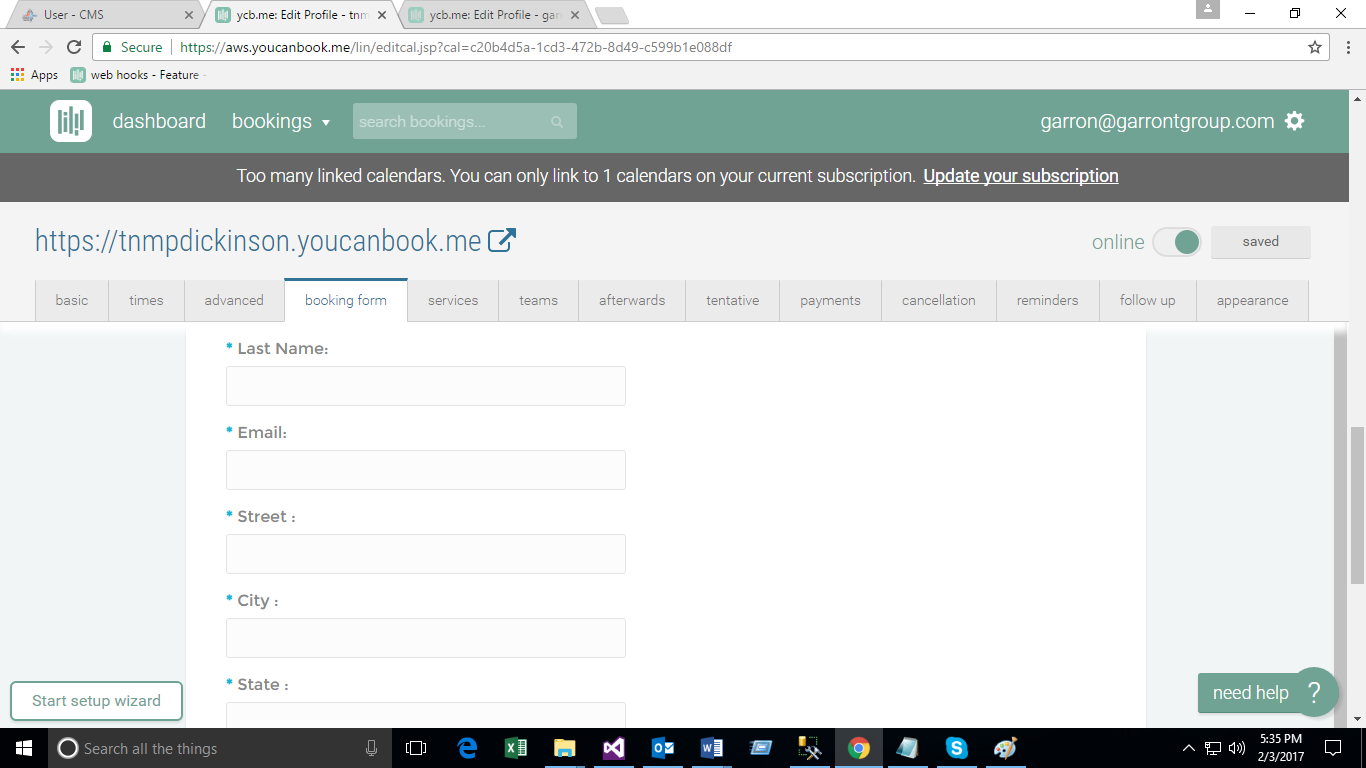
- Add next text box: Last Name
- Again click on “add a question” button. (See the screen)
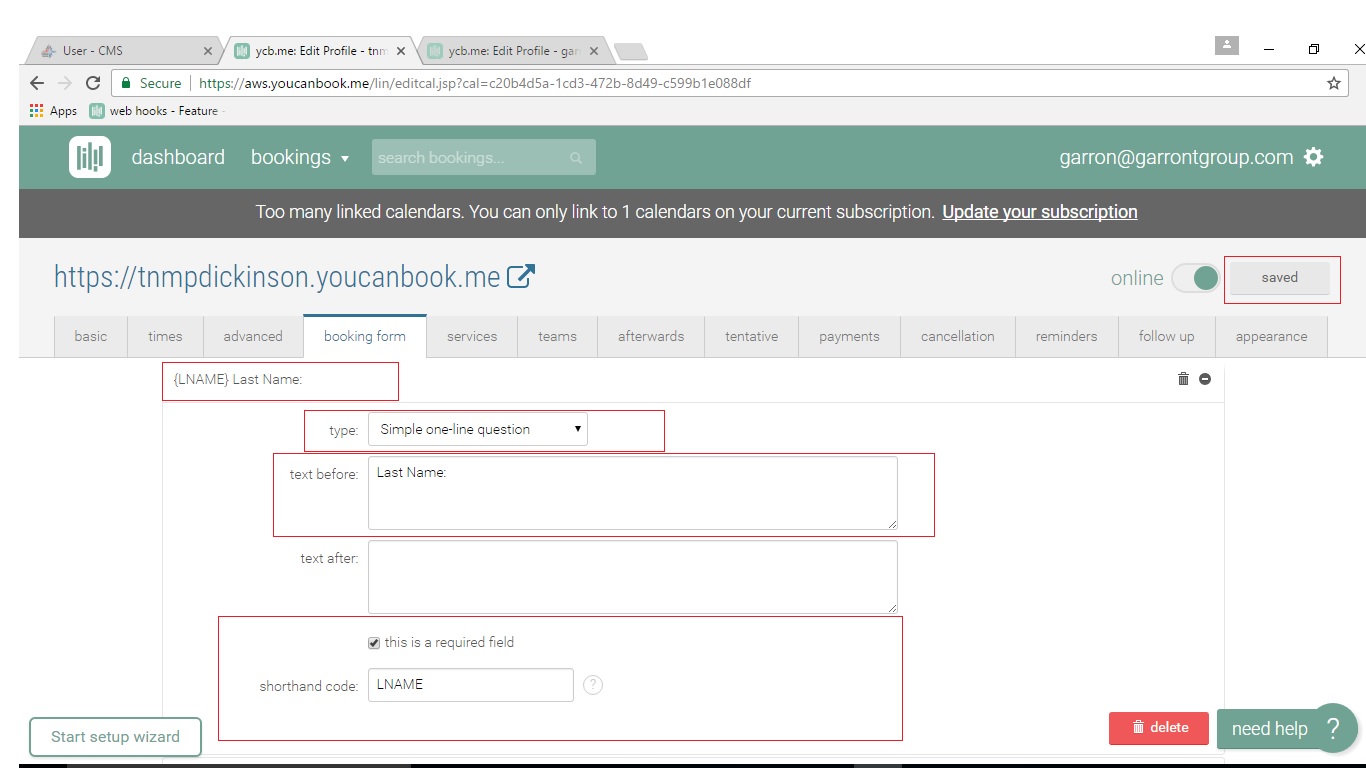
- Select “simple one-line question” option from the type Drop Down List
- Enter the text “Last Name : “ in the text before text box.
- Check the check box “this is a required field”.
- Enter the value “LNAME” in the shorthand code text box.
- Click on “Save” button.
- Again click on “add a question” button. (See the screen)
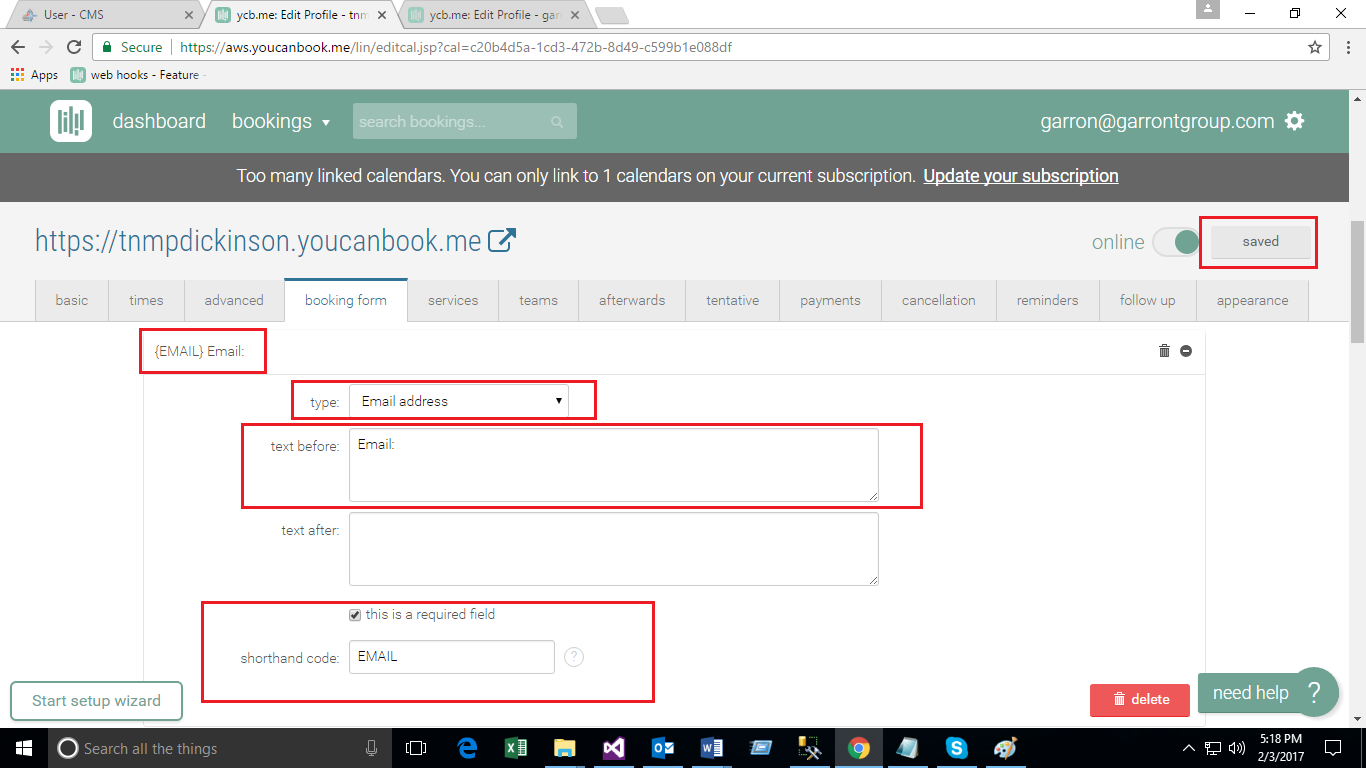
- Select “Email address” option from the type Drop Down List
- Enter the text “Email : “ in the text before text box.
- Check the check box “this is a required field”.
- Enter the value “EMAIL” in the shorthand code text box.
- Click on “Save” button.
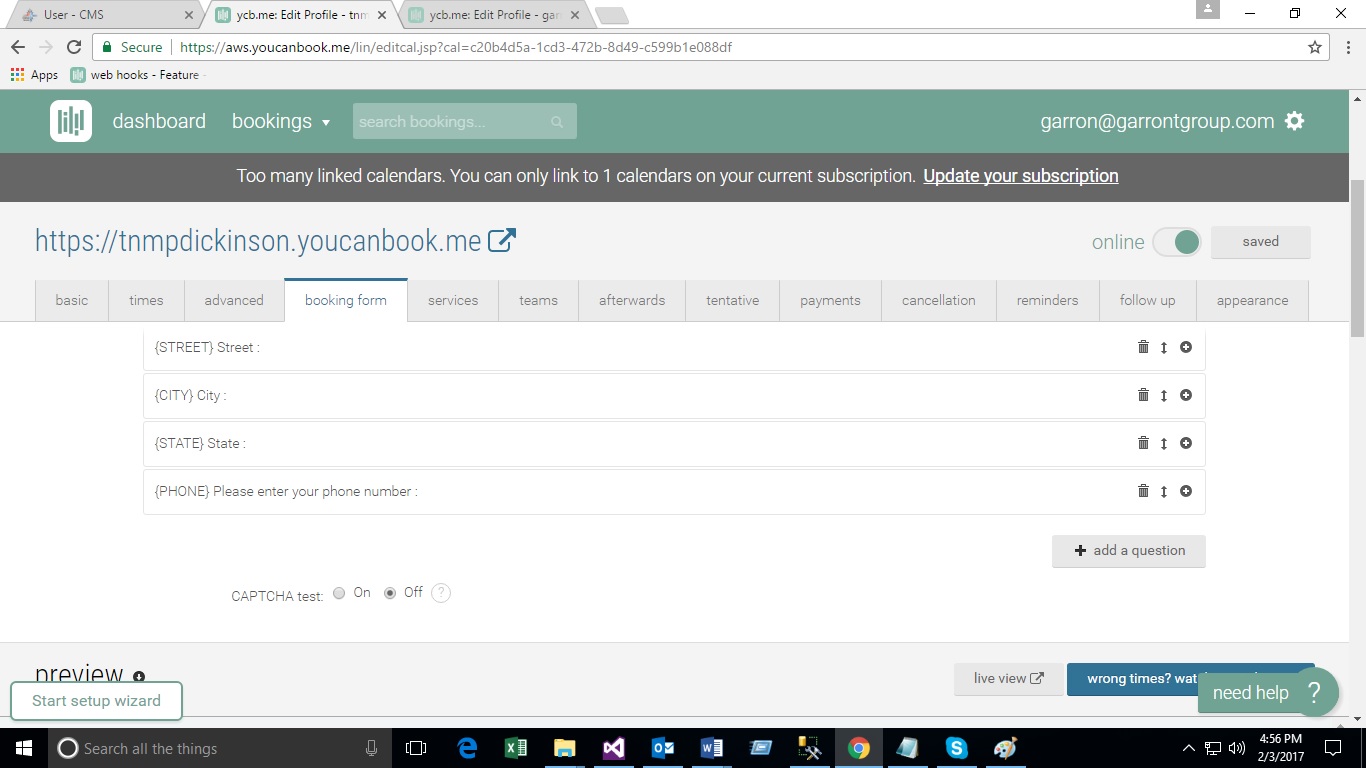
- Add next text box: Street
- Again click on “add a question” button. (See the screen)
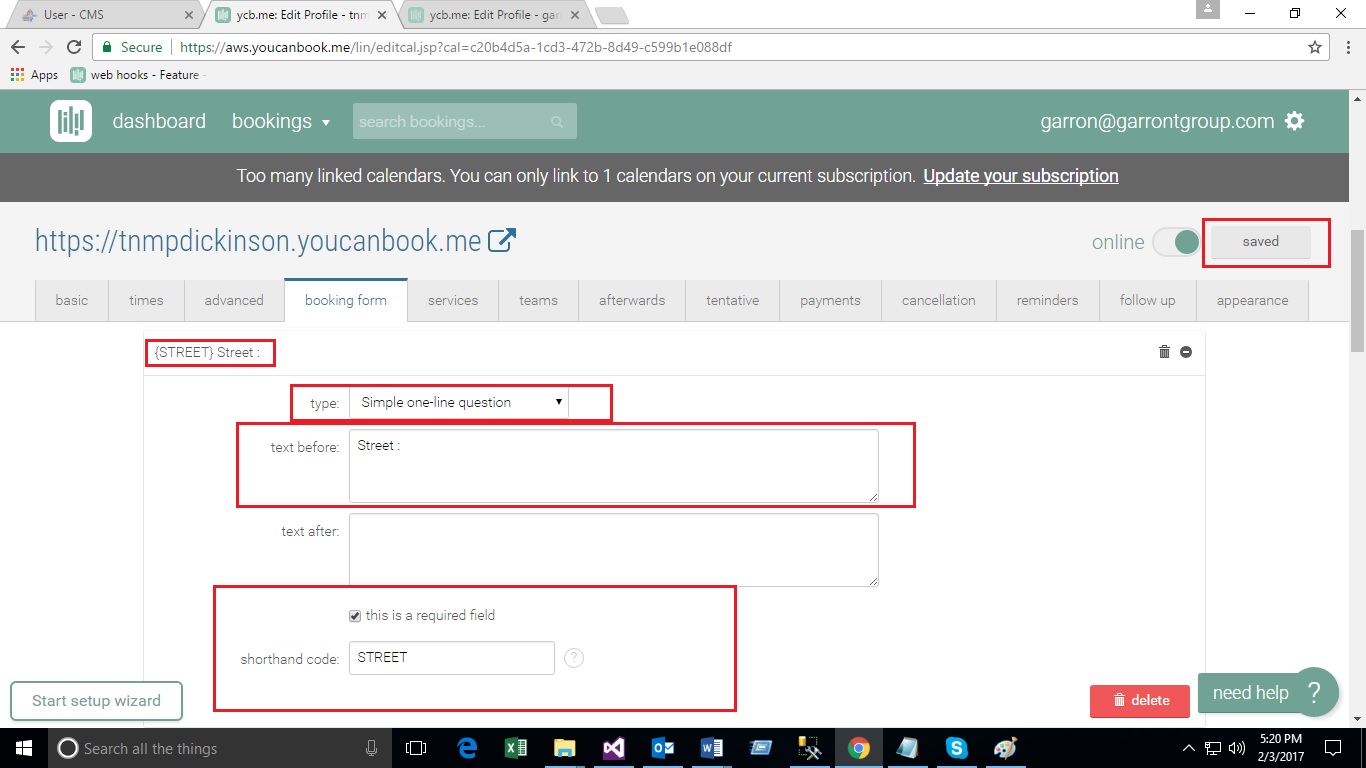
- Select “simple one-line question” option from the type Drop Down List
- Enter the text “Street : “ in the text before text box.
- Check the check box “this is a required field”.
- Enter the value “STREET” in the shorthand code text box.
- Click on “Save” button.
- Again click on “add a question” button. (See the screen)
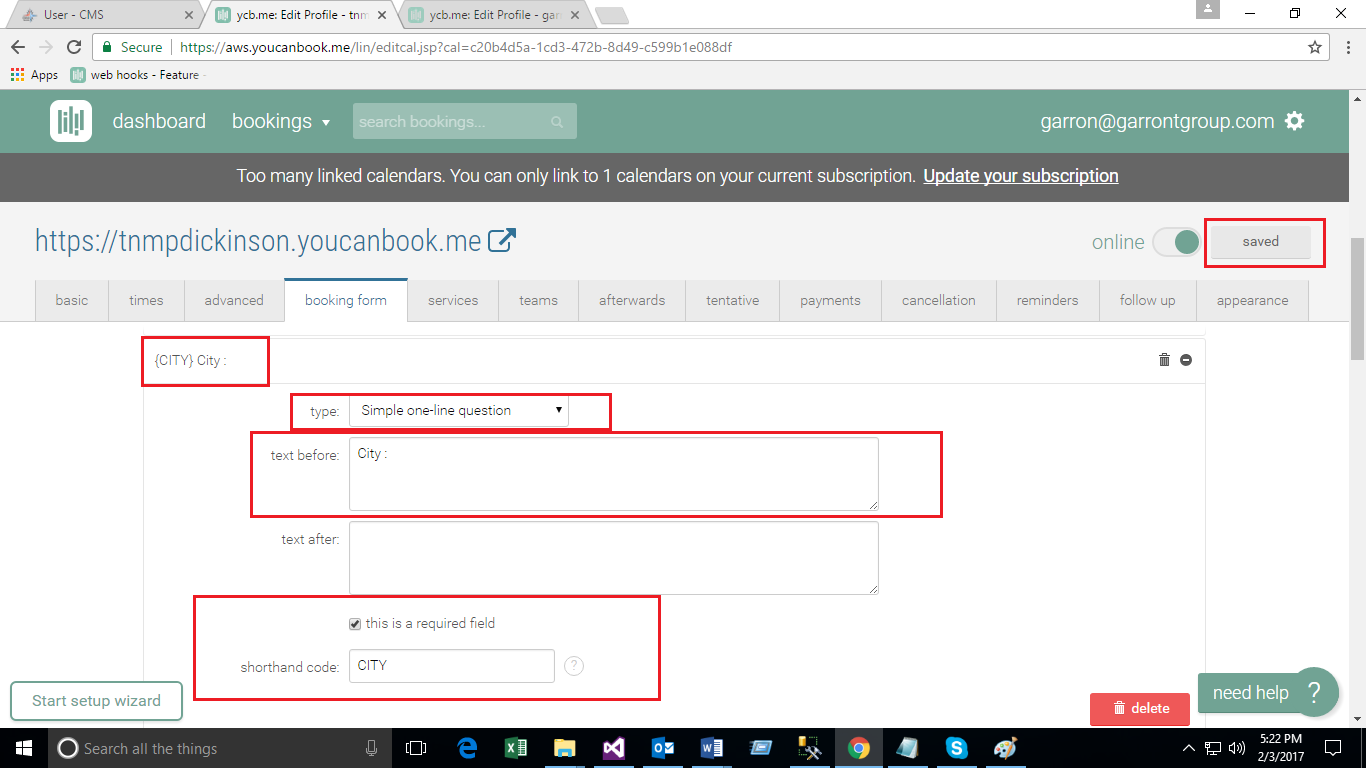
- Select “simple one-line question” option from the type Drop Down List
- Enter the text “City : “ in the text before text box.
- Check the check box “this is a required field”.
- Enter the value “CITY” in the shorthand code text box.
- Click on “Save” button.
- Again click on “add a question” button. (See the screen)
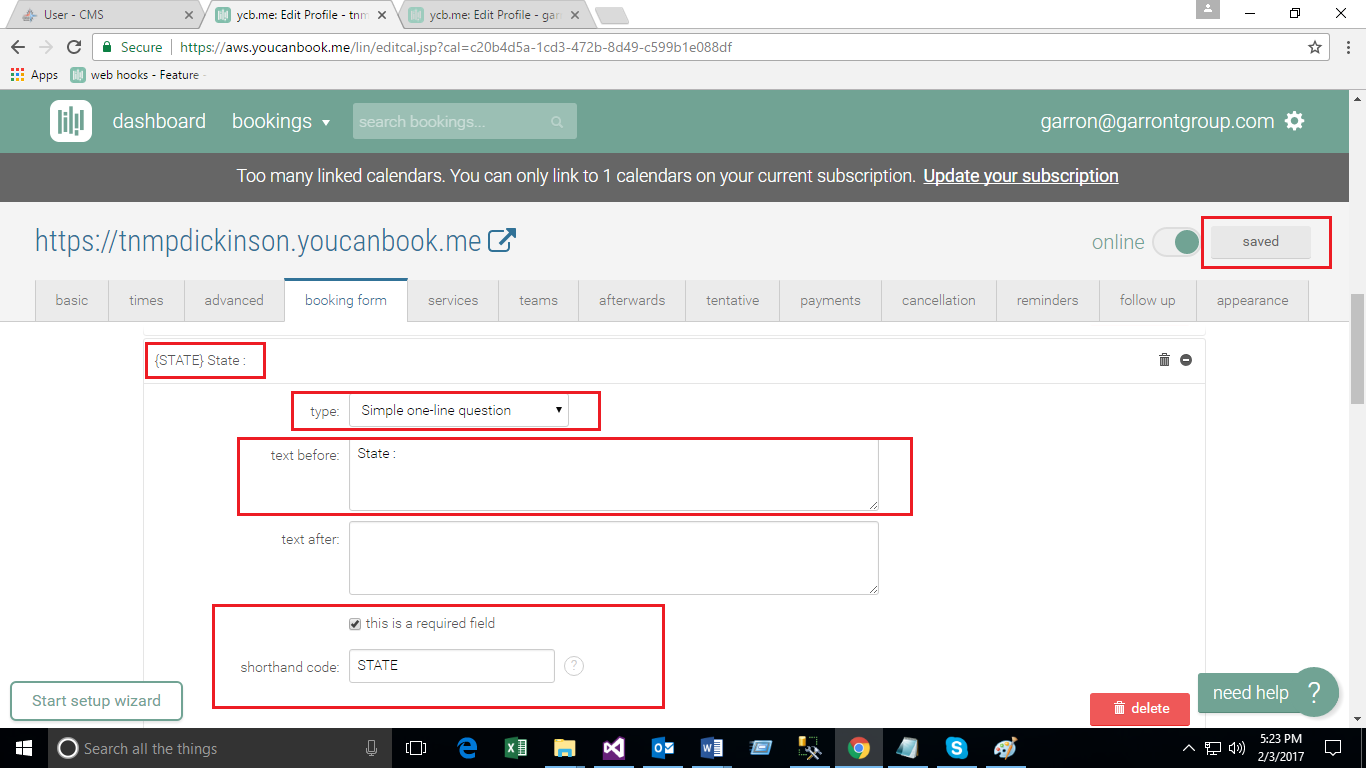
- Select “simple one-line question” option from the type Drop Down List
- Enter the text “State : “ in the text before text box.
- Check the check box “this is a required field”.
- Enter the value “STATE” in the shorthand code text box.
- Click on “Save” button.
- Add next text box: Phone number
- Again click on “add a question” button. (See the screen)
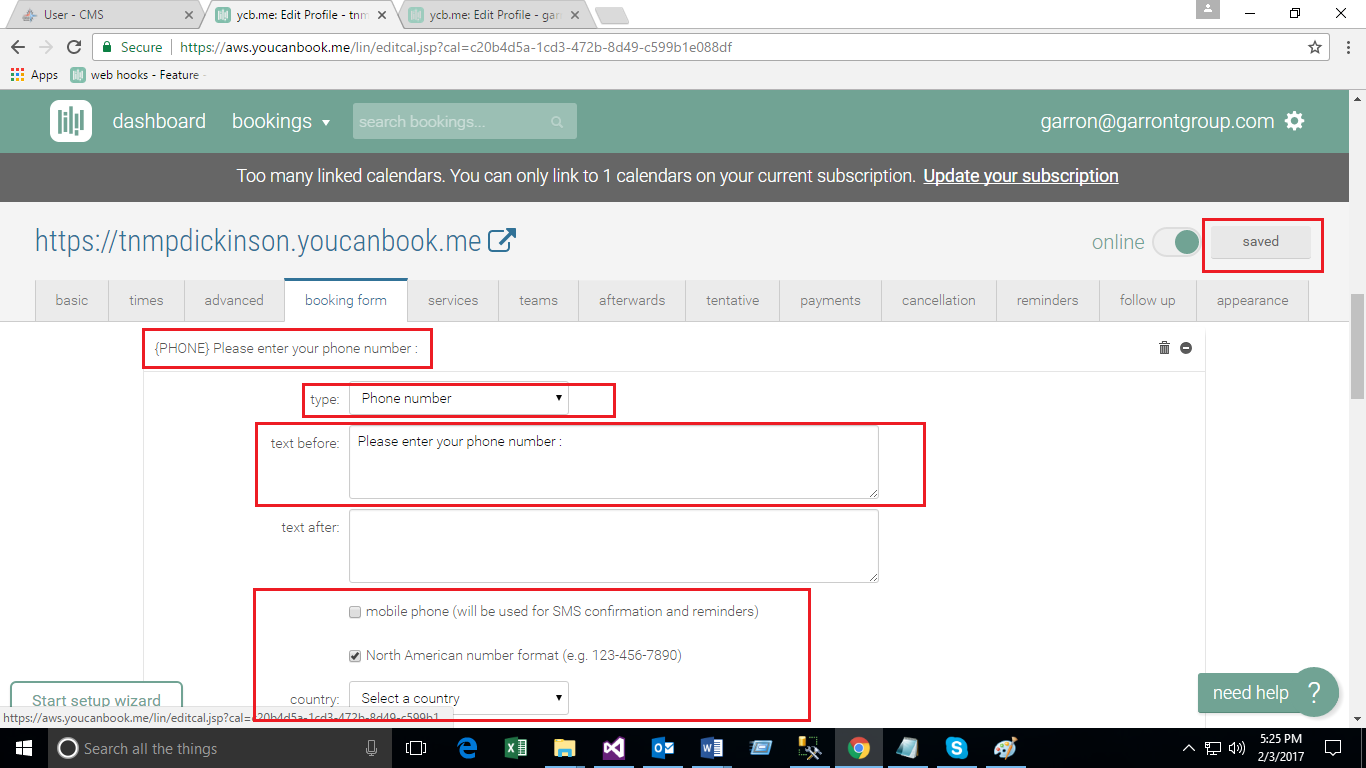
- Select “Phone number” option from the type Drop Down List
- Enter the text “Please enter your phone number : “ in the text before text box.
- Check the check box “North American number format (e.g. 123-456-7890)”.
- Check the check box “this is a required field”.
- Enter the value “PHONE” in the shorthand code text box.
- Click on “Save” button.
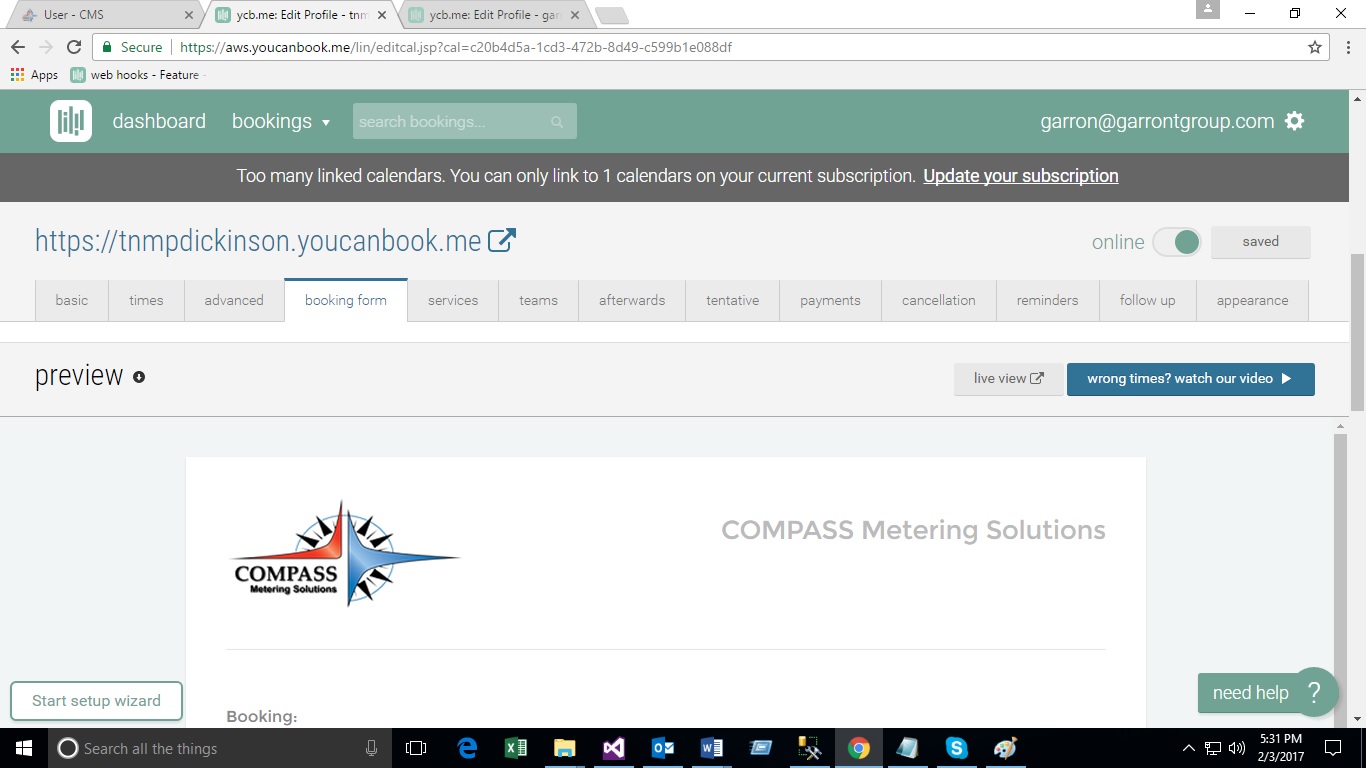
You can see your booking form created using above process as below: (See below screens)
5. Services
- If we use any external service for booking
6. Teams
- If we can make team for calendar then use this
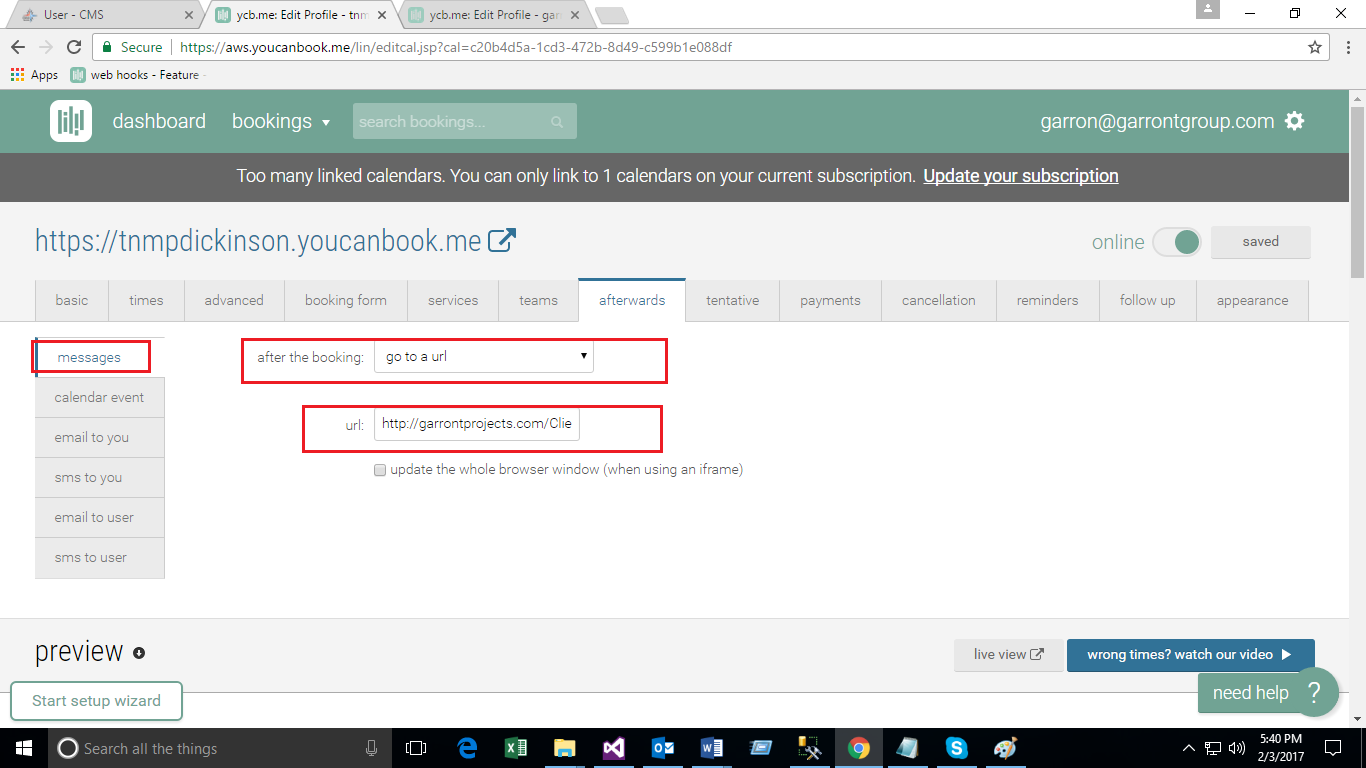
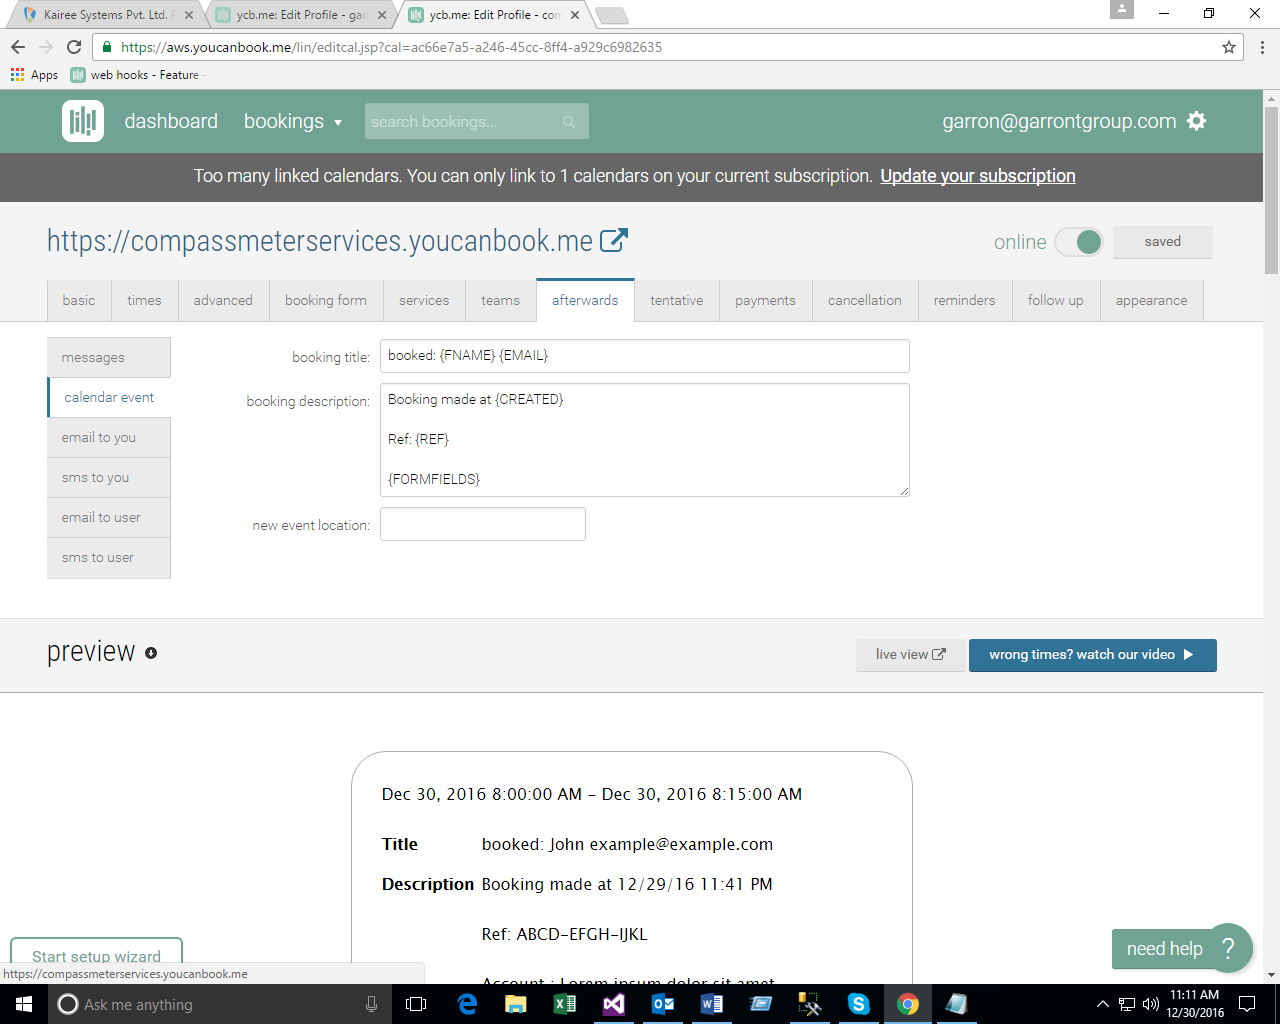
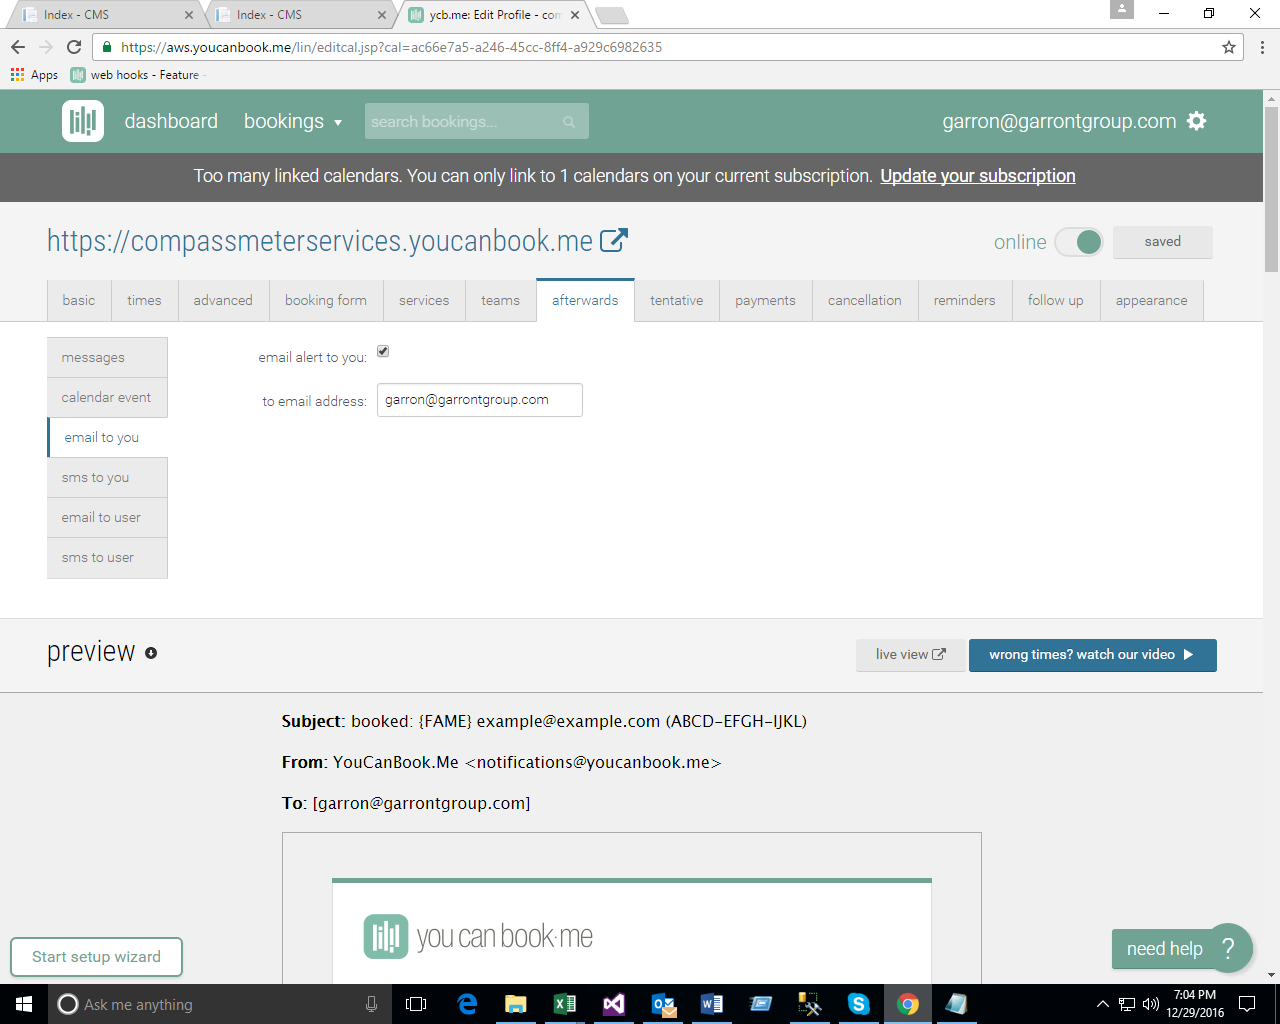
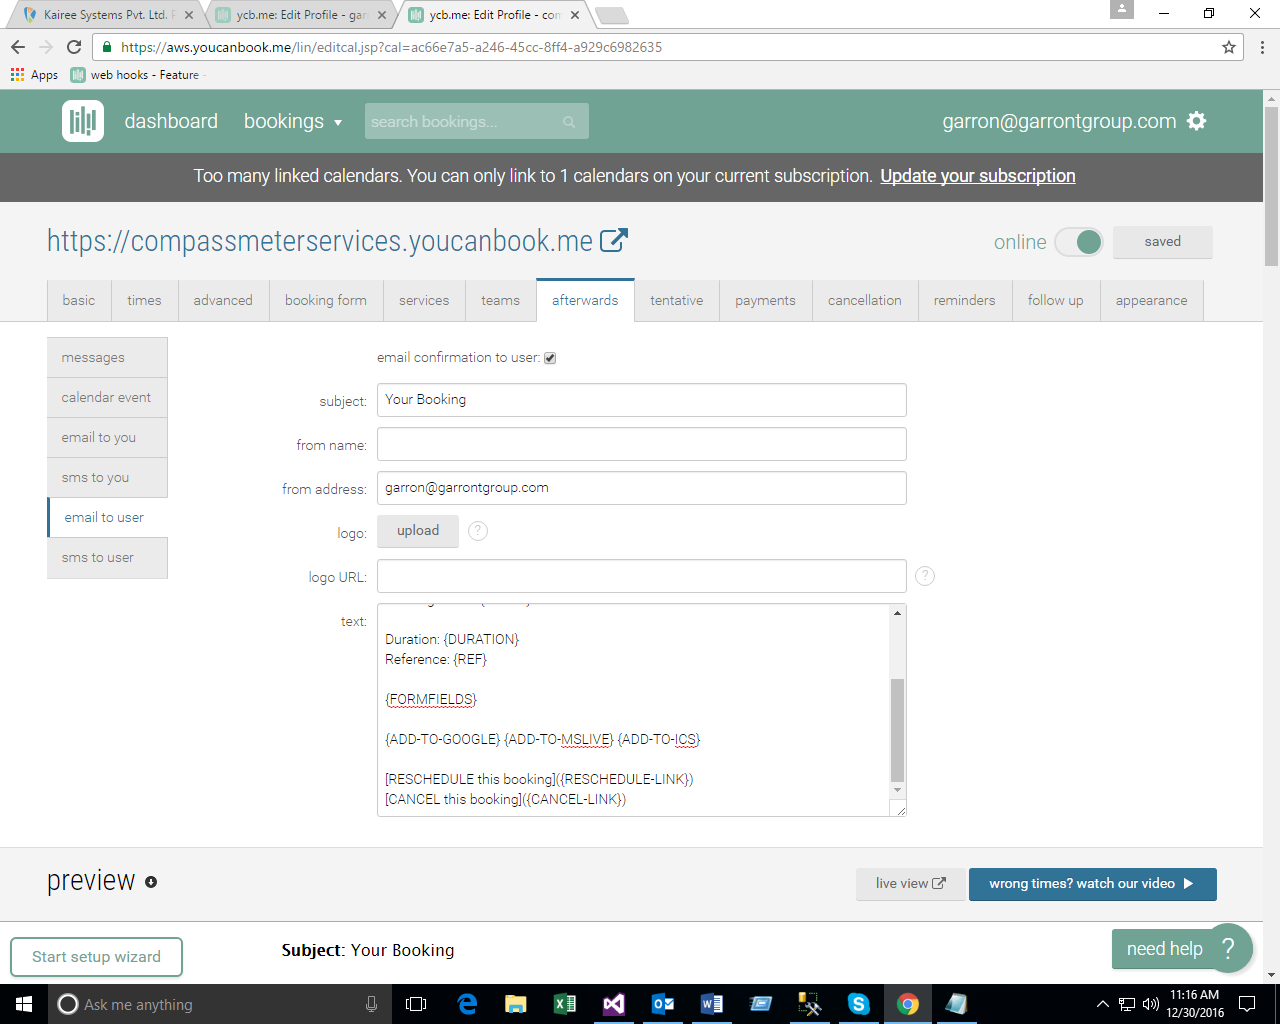
7. Afterwards tab:
- This setting is used for after booking the appointment if we want to set Email and SMS to the admin and user. Please see the screen:
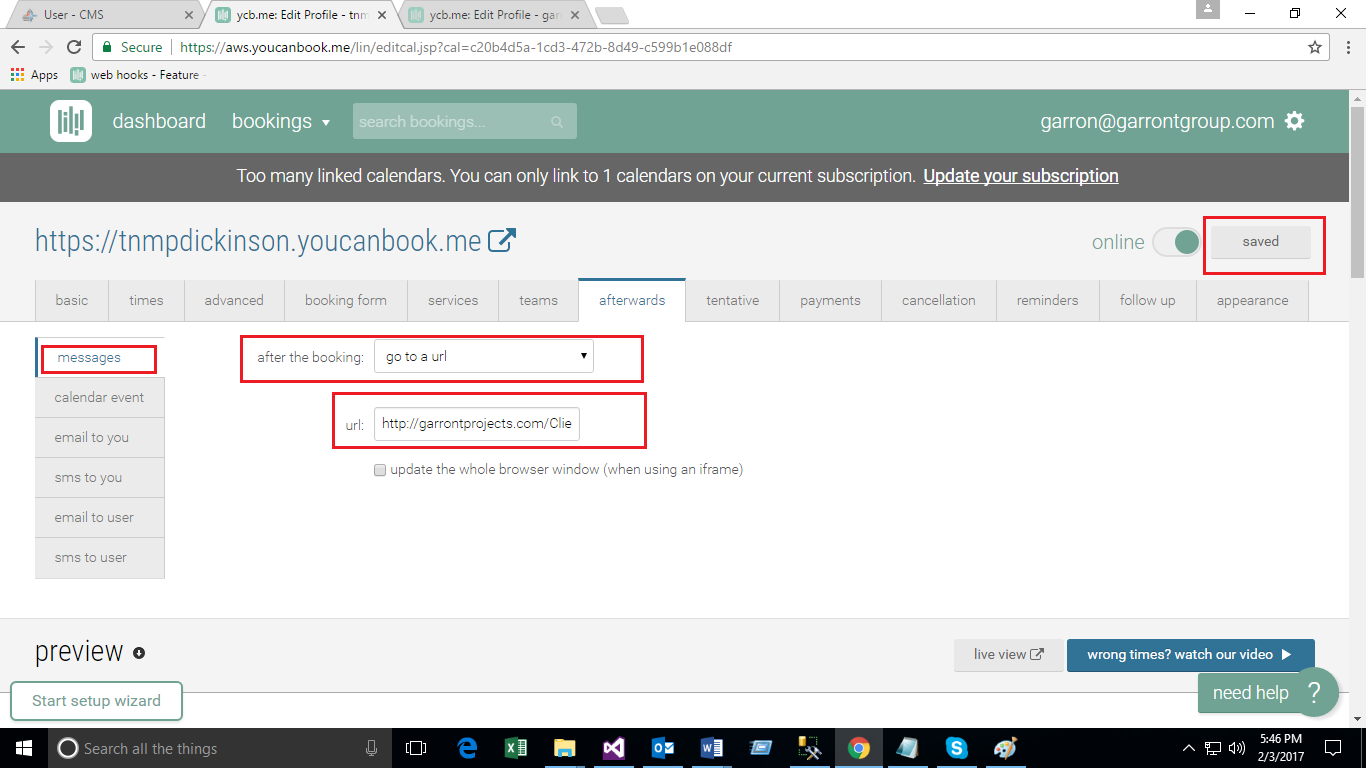
- This setting is used for the user redirection to our website url.
- Here we have to make redirect url and enter it in the text box
- See the screen below:
- Screen contains Subtabs as follows:
- Messages
- Calendar event
- Email to you
- SMS to you
- Email to user
- SMS to user
1. Messages Subtab:
- Used for display message after booking appointment.
- There is one Drop Down List for ‘after the booking’.
- That contains two options
- Display message (not choose)
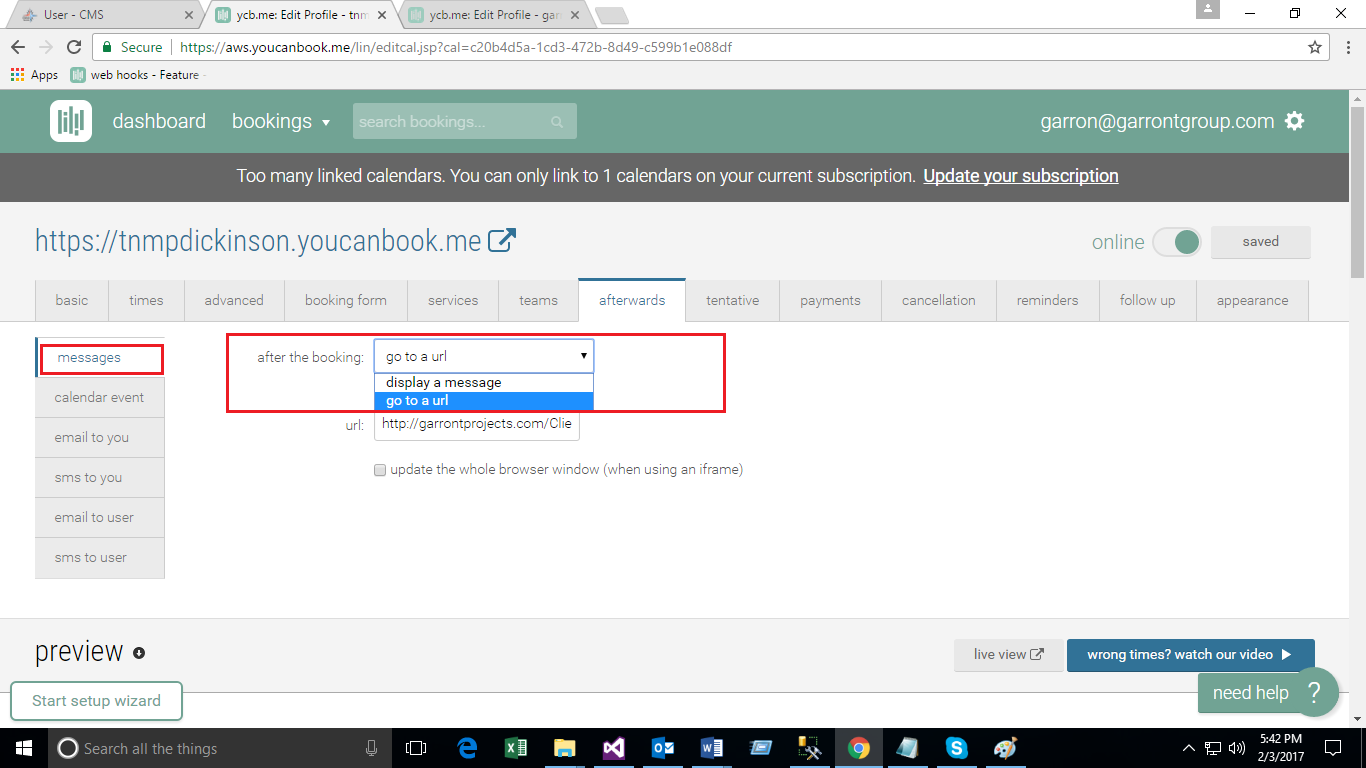
- Select “go to url” option
- Set the Redirect url to the web site here follow the steps:
See the screen
2. Calendar event
- Used for showing the calendar event
3. Email to you: - sending email.
4. SMS to you: Not Used (Paid SMS)
5. SMS to use: Not used (Paid SMS)
6. Email to user: - sending email to the user.
- Follow the process:
- Check the check box “email confirmation to user”
- Enter message “Your Booking in the” subject” text box.
- Enter “garron@garrontgroup.com” in the “from address” text box.
- Click on Save button located at the right hand side corner
Created with the Personal Edition of HelpNDoc: Free Kindle producer