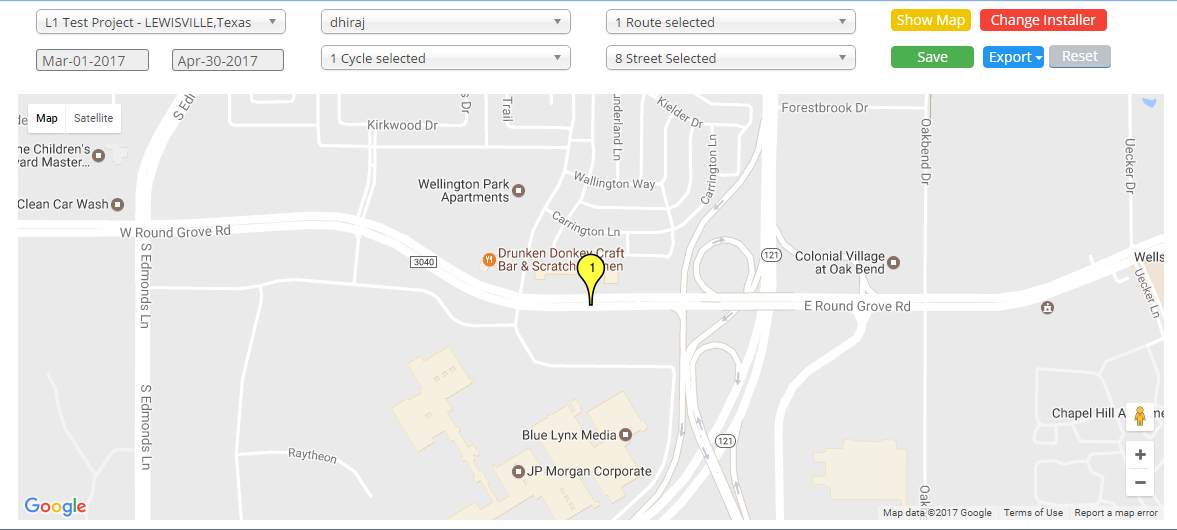
Installer Allocation
- This module is used to map addresses to installers.
- User can view all the allocated addresses on Google Map.
Screen:
Steps
- Click on the
 Menu to open Installer Allocation Page.
- Select Project from Project Drop down.
- Start Date and End of Project is automatically populated in respective fields.
- Dates can be changed.
- Addresses will be displayed to installers in mobile application only within this period.
- Select Installer from installer dropdown.
- Select the Cycle from Cycle dropdown.
- Multiple Cycles can be selected.
- All cycles can be selected by checking
 check-box from the dropdown.
- Select the Route from Route dropdown.
- Route dropdown is populated based on Cycles selected in cycle dropdown.
- Multiple routes can be selected.
- All routes can be selected by checking check-box from the dropdown.
- Select the Street from Street dropdown.
- Street dropdown is populated based on routes selected in route dropdown.
- Multiple Streets can be selected.
- All Streets can be selected by checking check-box from the dropdown.
- Click on
 button will display all the selected addresses on Google map as pins.
- All the addresses are numbered according to Lat - Long.
- User can Zoom-in or Zoom-out in the map using
 button.
- User can have satellite View of the map by clicking on
 option on map.
- Click on
 will save all the allocated addresses.
- Click on
 button to export all the details to Excel file. Details includes following
ClientName
|
ProjectName
|
StartDate
|
EndDate
|
InstallerName
|
Cycle
|
Route
|
City
|
Latitude
|
Longitude
|
Street
|
Status
|
- Click on
 button to reset all fields.
- If Addresses are already allocated for the selected date range, following pop up appears
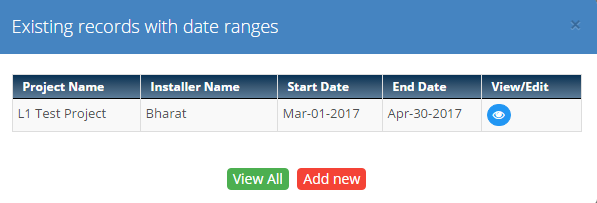
- To edit existing record, click on
 button and click on
  button
- Select the Visit Status from the dropdown
- Select the Street name from the dropdown
- Select the installer name from the dropdown

- To add new record, click on
 button.
- Installer allocation screen will appear.
- Follow the same, installer allocation steps.
- Select a different Date range, else again the above pop up will appear.
Created with the Personal Edition of HelpNDoc: Free HTML Help documentation generator