User Master
- This master is used to add users and their details.
- User and their details can be edited and deleted through this master.
- User wise permission can also be set from this page
- Admin has access to this master.
- A new role customer is added in user master
Screen: Landing Page
Steps
- Click on the
 Menu to open User Master Landing Page.
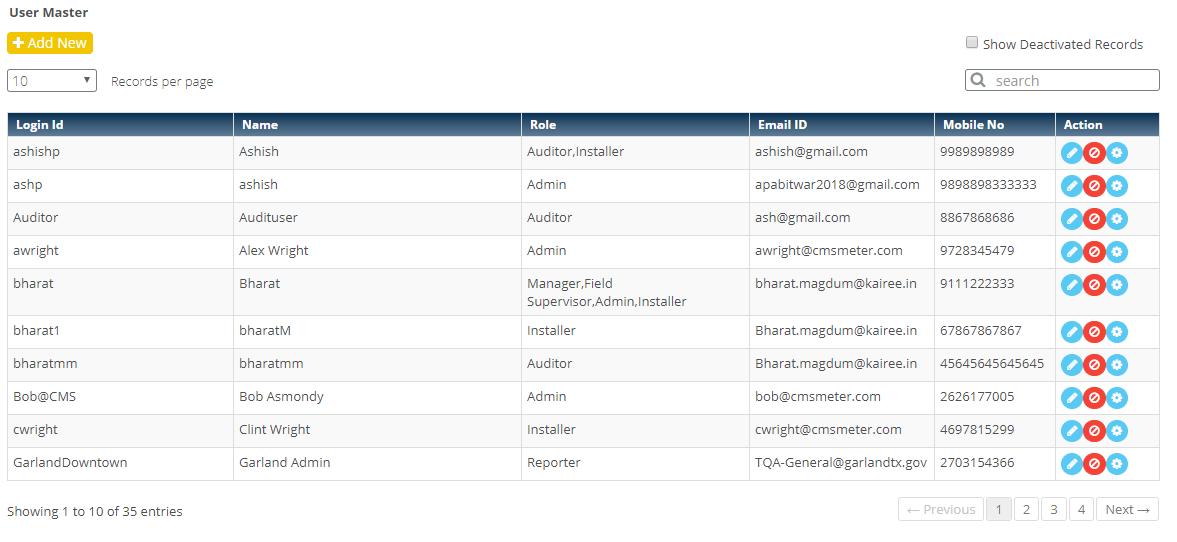
- It displays list of previously added users.
- Click on
 button to add new User.
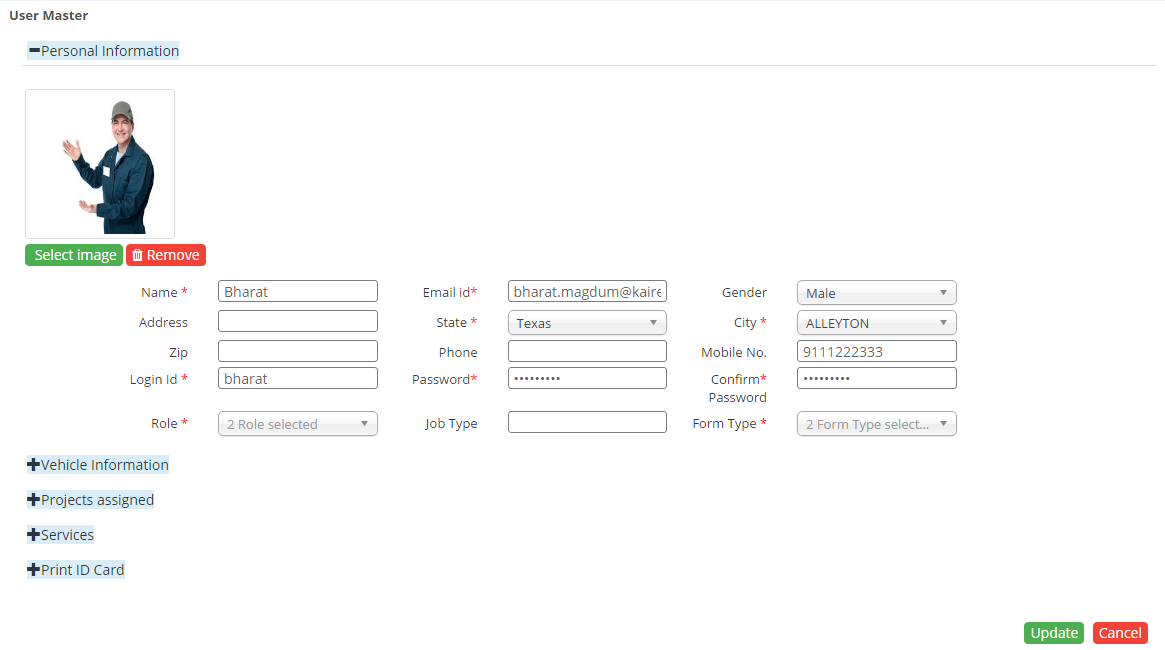
- Following screen will open

- Select an image for the profile.
- Enter the name of the user.
- Enter Email Id.
- Select the Gender from Gender dropdown.
- Enter the address.
- Select the State from state dropdown.
- Select the city from city dropdown.
- Enter the Zip Code.
- Enter the user's phone number.
- Enter the user's mobile number.
- Enter the login Id for the user.
- Enter the password.
- Re-enter the password for confirmation.
- Select the User Role from Role dropdown.
- Multiple roles can be selected.
- Click on the role to select it.
- To de-select, Click on the selected role.
- Enter the Job Type.
- Select the form type for the user from Form Type dropdown.
- Multiple form types can be selected.
- Click on the form type to select it.
- To de-select, Click on the selected form type.
- Select the manager for the user from the dropdown.
- Select the field supervisor from the dropdown. No need of selecting this for user installer
- Select the inventory transfer setting
- Yes, if approval is required for inventory
- No, if approval is not required for inventory
- Click on
 button to save the user.
- After saving, user will be added to the grid on landing page.
- Click on
 button to close the form.
- Click on
 button to reset all fields.
- Click on
 button to edit corresponding user detail.
- Following Screen will open
- Edit the field you want to edit.
- Click on
 button to save the Changes.
- Click on button to close the form.
- Click on
 button to set user wise access permission
- Following Screen will open
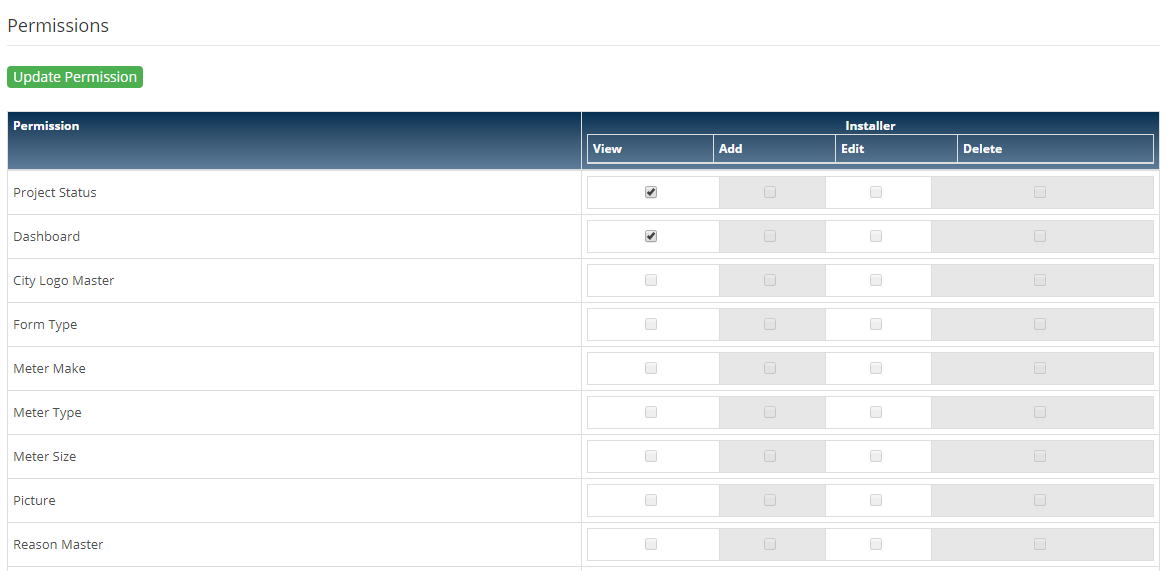
- By default, pages which are assigned to the user role will be displayed here
- User can check and uncheck the pages from the assigned list
- Click on button to save the Changes.
- Click on button to close the form.
In case of Installer User role, user has to fill Vehicle Information and service details
Vehicle Information
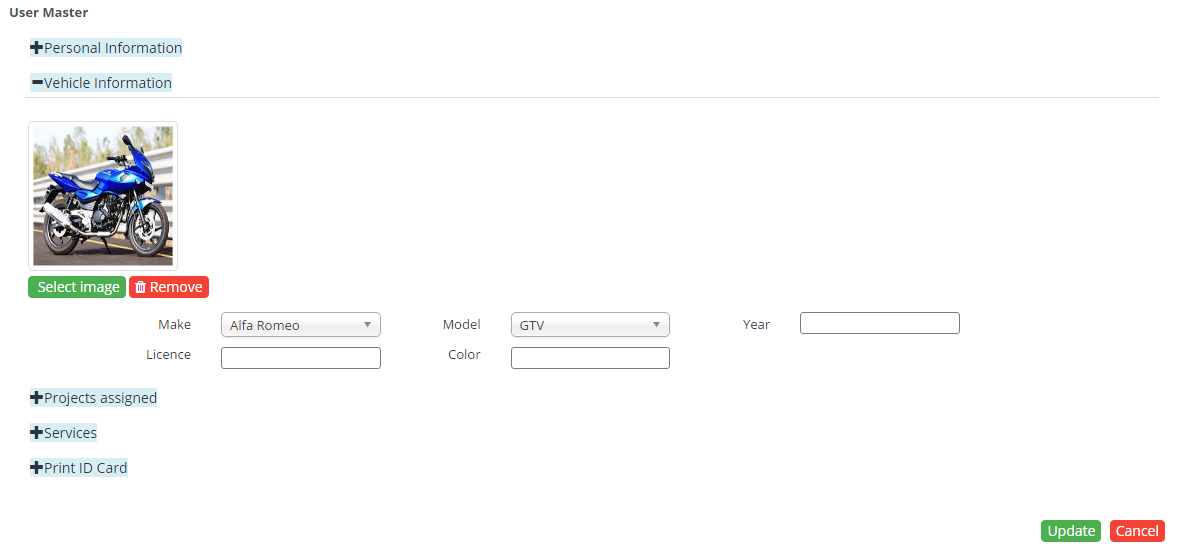
- Select image of the Vehicle.
- Select the Vehicle Make.
- Select the Vehicle Model.
- Enter the year.
- Enter the License Number.
- Enter the color of the Vehicle.
Services
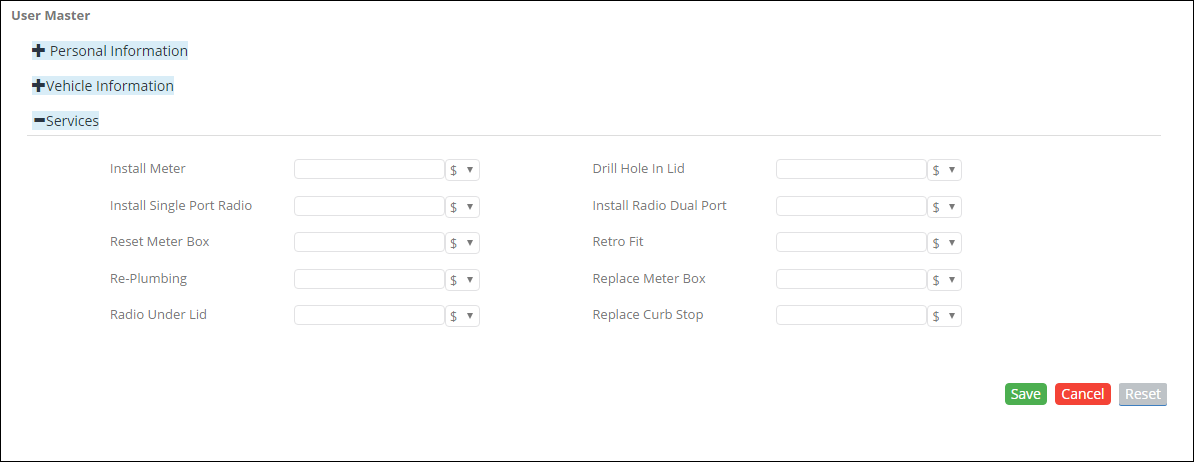
- List of all Services appears.
- Enter the rate for Services you want.
- Select whether service rate is in terms of percentage or it is in dollars.
- Click on button to save the user.
- Click on button to close the form.
- Click on button to reset all fields.
- To Edit installer role user, user will edit Vehicle Information and service details and click on Update button.
Print ID Card

- Select the Role from the dropdown
- Select the Customer name from the dropdown
- Select the State from the dropdown
- Select the City from the dropdown
- Enter the message to be printed on the ID card
- Click on
 button to look at the preview of the ID card
- Click on
 button to print the ID card.
- Click on button to close the form.
- Installer print card will be emailed to client once an appointment is confirmed and allocated to the installer.
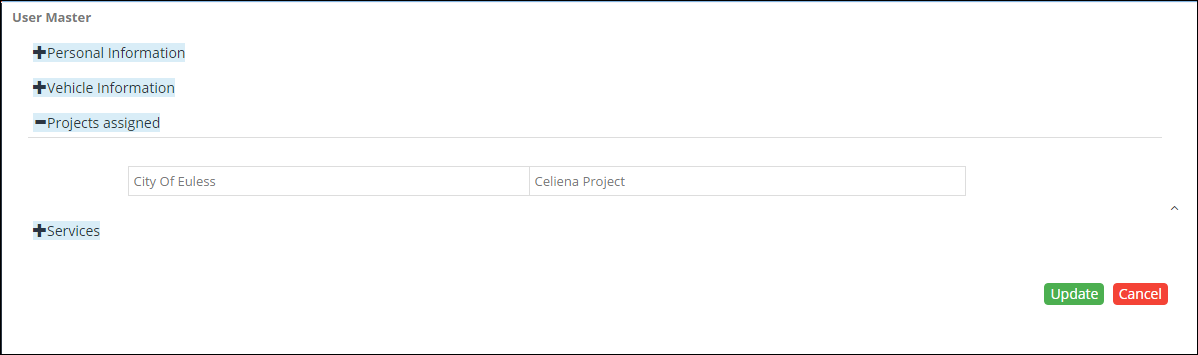
When Projects are assigned to User, admin user will get to see Projects Assigned to this user while editing any user as shown in the below screen.
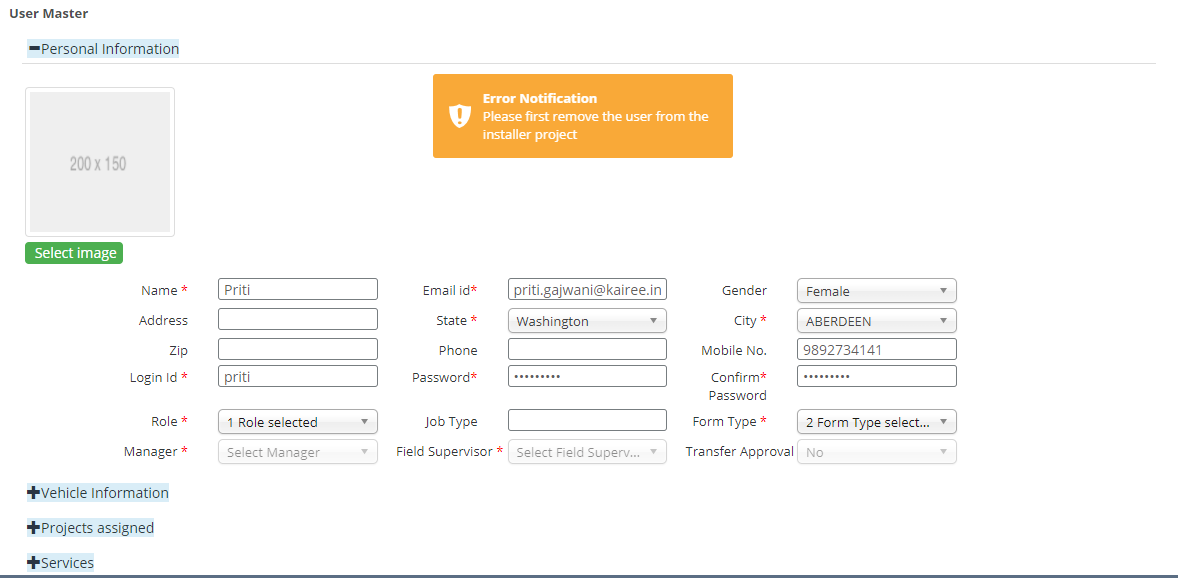
While removing role installer added validation to check the active project for user. Similar validation added for auditor role to check the active audit project mapped to user.
Created with the Personal Edition of HelpNDoc: Free help authoring environment